Looking for fun space crafts for kids to do with your children? Discover creative activities that are educational, engaging, and inspiring – perfect for exploring STEM topics!
Space Crafts for Kids – Fun Projects to Make and Learn!
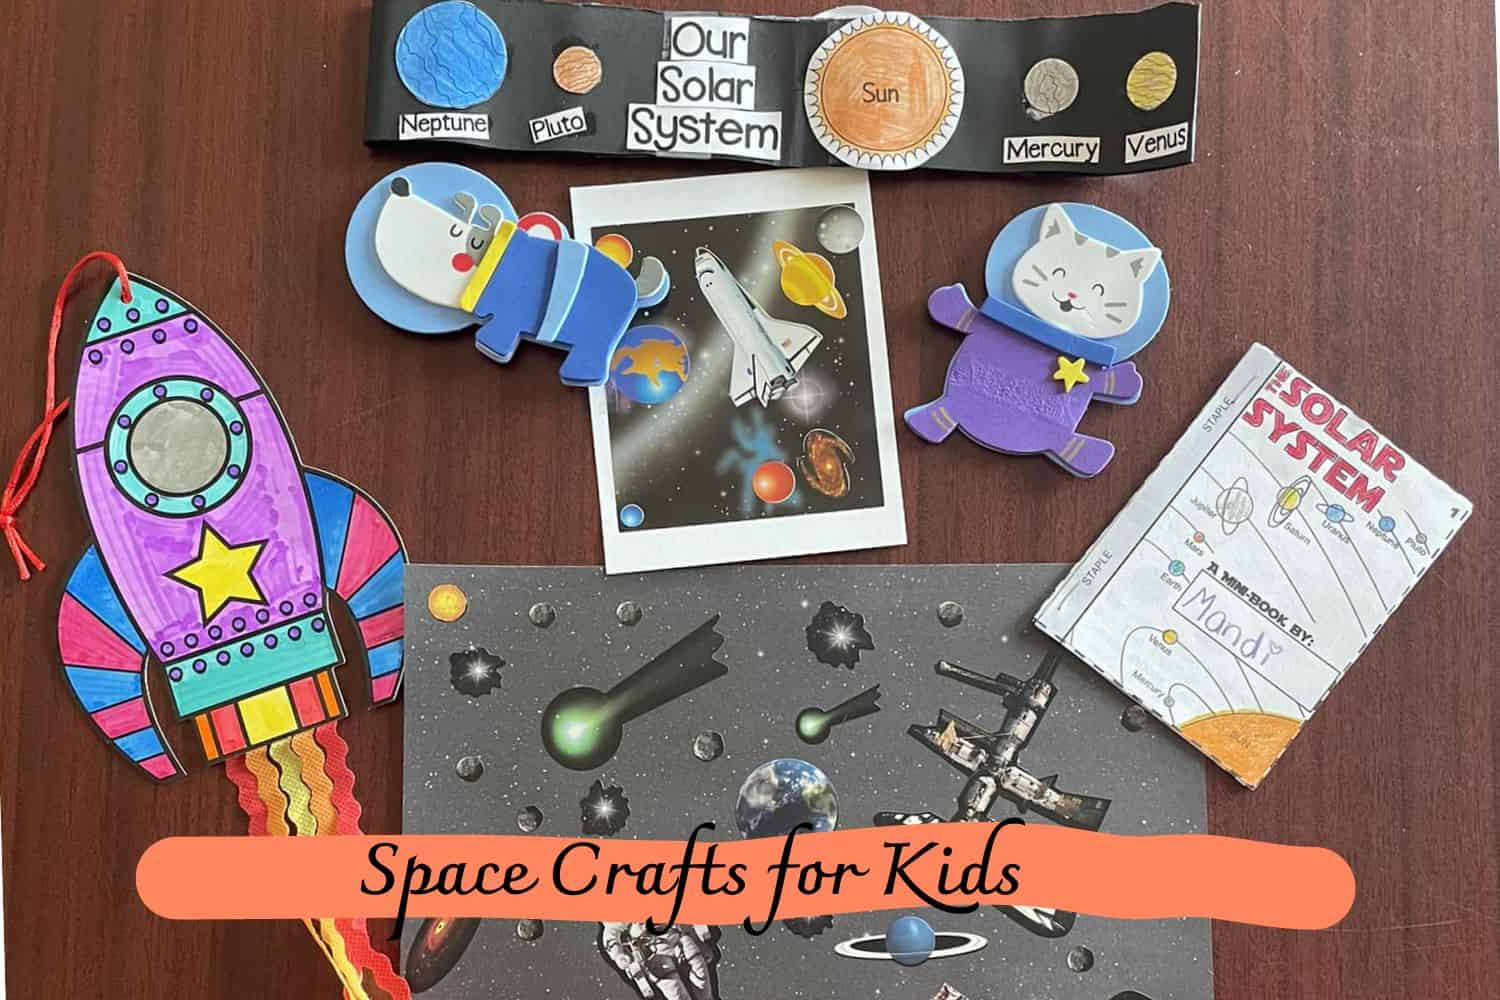
Do you want to take your kids on an out-of-this-world adventure that’s both educational and fun? Then it’s time to explore the amazing world of space crafts for kids! With a wide variety of materials, tools, and techniques available these days, crafting projects with a space theme can be as varied and creative as your child’s imagination.
Not only are these activities enjoyable for children of all ages but they also teach essential skills like problem-solving, teamwork skills, creativity, following instructions, etc.
Think astronaut caps, alien-inspired artworks, or maybe even building homemade rockets using recycled materials – no matter what kind of project they choose your little one is sure to have hours’ worth of awe-inspiring tinkering ahead!
Space Crafts for Kids Ideas
#1 Galaxy Slime Without Borax
Ingredients:
- 1 cup of Elmer’s clear glue
- Fine glitter in a variety of captivating galaxy colors (our kit included 5 different colors)
- 1 tablespoon of baking soda
- 2 tablespoons of contact lens solution (ensure it contains boric acid)
Instructions:
- In a large bowl, pour the clear glue.
- Add the glitters, baking soda, and contact lens solution.
- Use a fork to thoroughly mix all the ingredients.
- To prevent the slime from sticking to your hands, dip your fingers in a small amount of contact solution. Knead the slime until it forms completely. If it is still too sticky, add a teaspoon of contact lens solution at a time and knead again.
- This slime is incredibly sparkly and your kids won’t be able to resist playing with it!
- The amount of glitter can be adjusted according to your preference, as no specific measurements are provided. For our version, we used 5 different colors from a 30-set glitter kit – pink, purplish-pink, teal, green, and blue, along with a touch of silver.
- Alternatively, you can simplify the process by using Elmer’s glitter glue in pink and blue, which eliminates the need for additional glitter. However, we enjoy customizing our slime with our glitter to achieve the desired effect.
#2 Straw Rockets
Supplies:
- Rocket Template
- Sharpie Fine Markers
- Scissors
- Clear Glue
- 10mm Straw
- 8mm Straw
Instructions:
- Create a captivating rocket temple by following these simple steps. Please note that younger children may need assistance from an adult.
- To start, gather two straws of different sizes – one should have a larger diameter than the other. We recommend using an 8mm paper straw and a clear plastic 10mm straw. Set aside the smaller straw for now.
- Take a 2″ long piece from the larger straw and securely seal one end by placing a piece of tape over the top and around the edge.
- Next, apply a thin line of clear glue to the back of the rocket. Carefully position the larger straw over the glue, ensuring that the capped end is towards the top. Allow the glue to dry completely.
- Insert the smaller straw into the back of the rocket, ensuring everything is securely in place.
- Now, it’s time for takeoff! Challenge your friends, family, or classmates to a rocket-building competition.
- To launch your rocket, tilt your head back slightly and place the straw in your mouth. Blow a forceful burst of air into the straw and watch your rocket soar through the sky!
#4 Galaxy Snow Globes
Materials:
- A snow globe (Read on for more information)
- Distilled water
- Food coloring
- Silver glitter
- Silver star confetti
- Baby oil
Instructions:
- Achieve your desired color by adding food coloring to the water.
- Fill the snow globe halfway with baby oil.
- Sprinkle a touch of glitter and stars, ensuring not to go overboard.
- Fill the remaining space in the globe with your colored water, leaving room to close the lid.
- Give it a gentle swirl and immerse yourself in the enchantment of starry skies and dreams of distant lands.
- This beautifully crafted snow globe also makes a perfect gift.
#5 Recycle CD Planets
Supplies:
- A 4-inch styrofoam ball
- Paint (we recommend using Crayola)
- A toothpick
- A CD or DVD
- Hot glue
Optional: Glitter for those who love a little extra sparkle.
Instructions:
1. Create a Customized Planet
Start by cutting a styrofoam ball in half for your child to work with. Then, let their imagination run wild as they paint the planet in their favorite colors and patterns. From rainbow designs to recreating their favorite planets like Earth, Mars, or Jupiter, the possibilities are endless. To add a touch of sparkle, sprinkle some glitter on the planet.
2. Simple Assembly
Once the paint has dried (perfect for during nap time), use hot glue to attach a DVD to the bottom of the planet. Next, insert a toothpick in the center and secure it with a little more glue at the top. And just like that, you have an incredibly easy and fun planet craft!
This project is perfect for children around the age of five, and it’s budget-friendly too, as the only item you’ll need to purchase is the styrofoam ball. Let their imagination soar with this fun and easy craft.
#6 Plastic Egg Alien Craft
Supplies:
- Plastic egg in a vibrant color
- Pipe cleaner
- Pom poms
- Googly eye
- Sticky tabs
- Markers
- Scissors
Instructions:
- Start by separating the two halves of the plastic egg. Then, carefully make two holes in the top part and insert a pipe cleaner through them.
- Stand the top half of the egg upright and trim off any excess pipe cleaner.
- Twist the pipe cleaner antennae together and securely attach them to the ends using tack-it tabs.
- Attach two pom poms to the tack at the ends of the pipe cleaner stem.
- Rejoin the two halves of the egg. Next, place a large googly eye in the center of the top half and use a paint marker to draw a cheerful smile.
- Add additional details such as spots using chalk or neon markers.
- Lastly, attach a tack piece to the bottom of the alien egg so that it can stand upright.
#7 Wall hanging space mobile craft
Supplies:
- Color cardstock
- Star paper punch
- Circle paper punch in 1 1/2″ and 2″ (optional but recommended)
- Black and white baker’s twine
- 1/4″-1/2″ wooden dowel
- Pastels (optional)
- Glue dots
Instructions:
To create a visually stunning display of planets and stars, follow these easy steps. Start by drawing circles for each planet. Use a 1.5″ circle for Mercury and Mars, and a 2″ circle for Venus, Earth, Neptune, and Uranus. For the sun, Jupiter, and Saturn, freehand your circles. Remember to cut two of each circle for symmetry.
After cutting your circles, consider adding dimension by using pastels to add color and depth to the planets. Simply swipe or smudge the colors onto the circles with your hands. Pastels are forgiving, so you can experiment with different shades and techniques.
Next, cut black stars using a star paper punch. Don’t forget to cut a small ring for Saturn as well.
To create the hanging display, cut 9 pieces of baker’s twine, each measuring 12-18″ (depending on your desired length). Also, cut one piece to use as a hanger. Adjust the length of a wooden dowel according to the space you plan to hang the display in. Aim for around 18 inches.
Now, tie each piece of twine to the dowel using a square knot (remember right over left, left over right). Leave the excess twine hanging down for now.
Using glue dots, attach each planet to its corresponding string by sandwiching the twine between the planet and another cut circle. Repeat this step for the stars as well. Arrange the planets and stars along the strings to achieve a visually pleasing layout. Refer to the provided pictures for inspiration.
Finally, trim the ends of the knots to give a neat appearance. Attach the hanger to the opposite ends of the dowel. Your stunning planet and star mobile is ready to be displayed!
#8 Galaxy Playdough
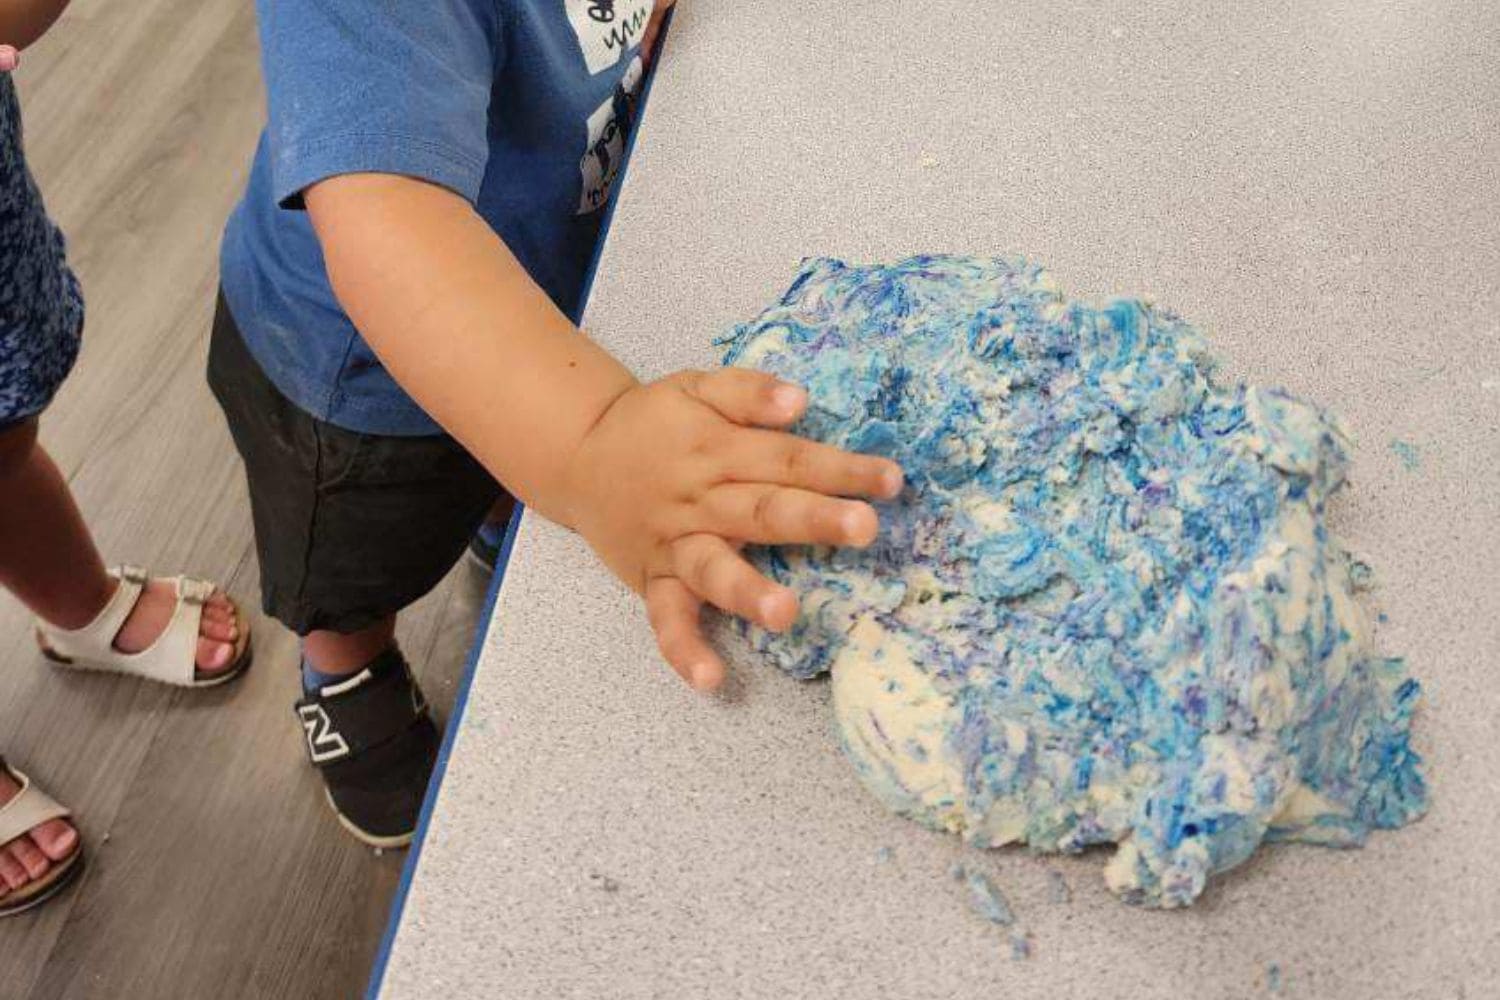
Ingredients:
- 1 cup of flour
- 1 cup of water
- 1/2 cup of salt
- 1 tablespoon of vegetable oil
- 1 teaspoon of Cream of Tartar
- Purple, turquoise, and pink food coloring
- Pink, turquoise, and silver glitter
- Silver glitter stars
Instructions:
Step 1: Mix and Cook
- Combine all the ingredients (excluding the glitter) in a saucepan. Stir well.
- Cook the mixture over medium heat until it thickens and forms clumps.
- Transfer the playdough onto a cool surface, like a counter, and let it cool.
- Admire the stunning swirls of pink, purple, and blue in this galaxy playdoh.
Step 2: Create a Beautiful Marble Effect
- Once the play dough is cool to the touch, blend all three colors. Gently knead to achieve a marbled effect.
- Take your time to get the desired effect, but be careful not to overmix and end up with a single color.
Step 3: Add Glitter for a Shiny Galaxy Effect
- Sprinkle the glitter onto the play dough and mix it in gently. This is the best part!
- To prevent a messy cleanup, you can do this step over a paper plate or cookie sheet to easily discard excess glitter.
Extra Tips:
– Use star-shaped cookie cutters to create stars from the galaxy playdough. Feel free to experiment with other shapes as well.
– For moons, employ circle cookie cutters. You can make a half moon by slicing one in half with a plastic knife, or create a crescent moon by cutting a sliver off the circle.
Enjoy your Finished Galaxy Glitter Playdough!
Kids will have a blast using small cookie cutters to make star shapes and explore other shapes as they wish. And don’t forget to embrace the shiny magic of glitter – it adds an extra touch of wonder to this galactic playdough experience.
#9 Constellation Cards
Supplies:
- A4/Letter Size black card
- Pencil or colored pencil
- Gold or silver pen
- Gold or silver star stickers
- Ruler
- Scrap paper for sketching your design
Instructions:
- Let your creativity soar as you sketch out your desired constellation design on scrap paper. Draw dots for the stars and use a ruler to connect them, forming a delightful shape. Whether it’s a Christmas tree, a stocking, or something unique, the choice is yours!
- Take a piece of black card and fold it in half. Use a pencil or colored pencil to lightly trace your design onto the card.
- Connect the dots on the card using a ruler and a gold or silver pen, adding a touch of glamour to your constellation.
- Bring your cards to life by sticking gold or silver star stickers on the dots, turning them into dazzling stars.
- Repeat the process for as many cards as you desire, making each one a personalized work of art. Let the fun begin!
- Complete the cards by adding heartfelt messages inside and sending them to your friends, spreading joy and creativity.
Unleash your imagination with constellation cards. Looking to delve deeper into the wonders of constellations? Explore books or even acquire a constellation globe to nurture your child’s curiosity.
#10 Moon Rocks
Ingredients:
- 4 cups of baking soda
- 1/4 cup of water
- Sparkling gold and silver glitter
- Black food coloring
Instructions:
- Create a mixture of baking soda and water in a spacious plastic container. Enhance the mixture by adding an abundance of glitter and a few drops of food coloring. Stir the ingredients together thoroughly.
- Give your children the opportunity to enjoy playing with this simple and enjoyable Moon Sand for a short period. However, be aware that their hands may become messy due to the food coloring. Alternatively, you can proceed directly to the next step of creating your rocks.
- Shape the sand into rocks using your hands. We recommend pressing your fingers into the sand to create craters on the surface, adding a unique touch.
- Allow the rocks to air dry overnight, ensuring they become solid. Although they may be somewhat fragile, children will delight in exploring and examining these captivating creations.
#11 Flying Rocket Craft
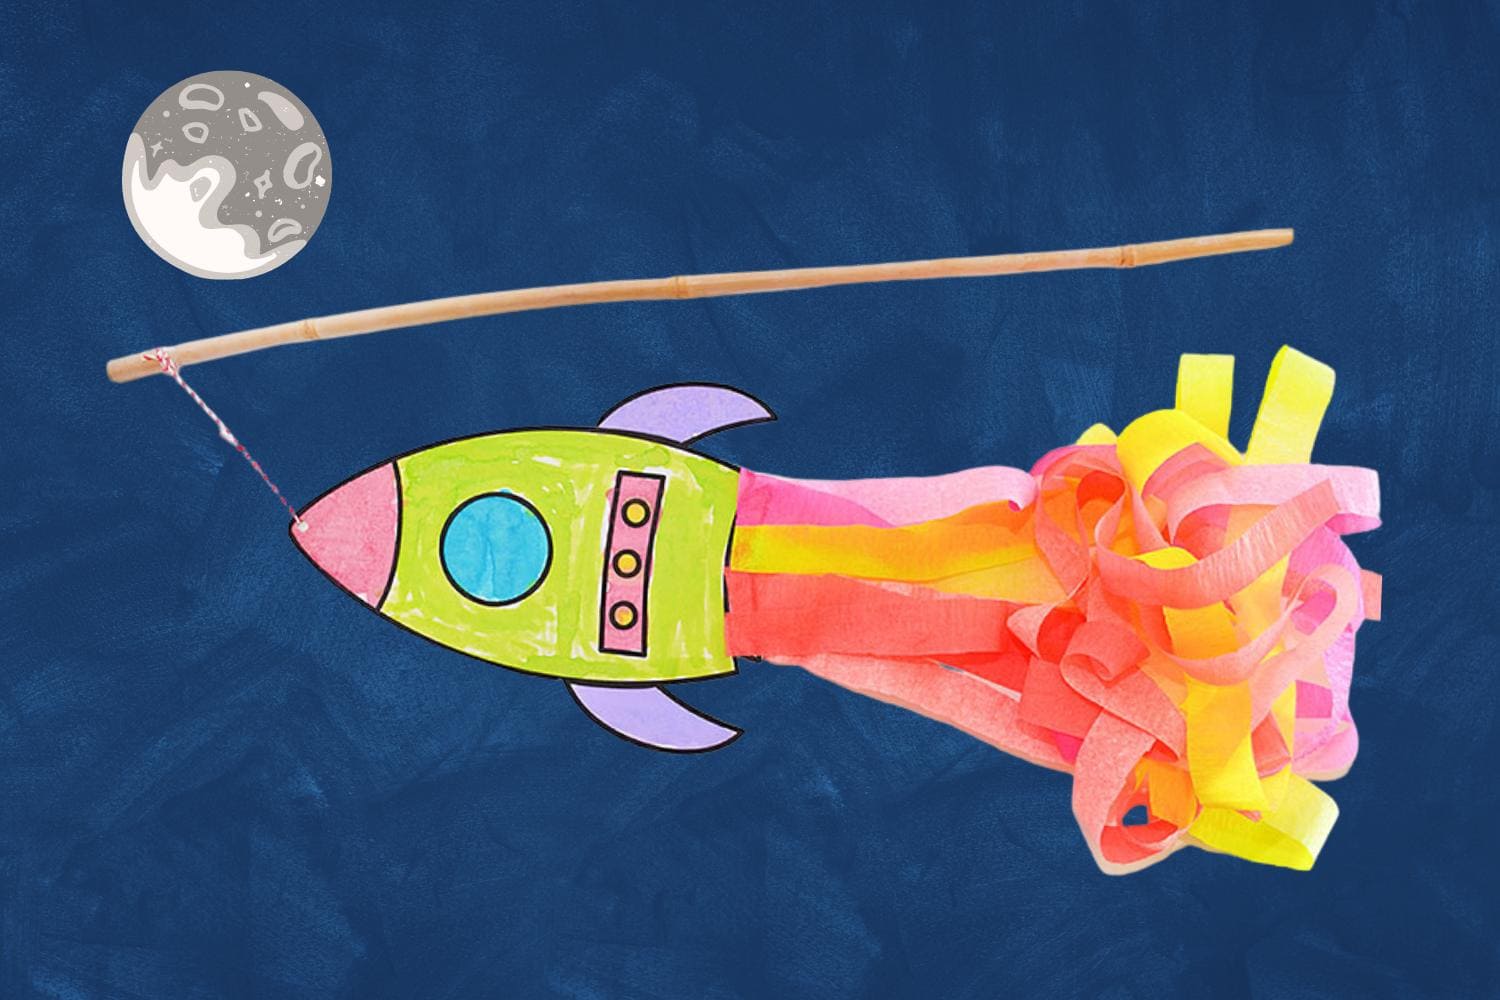
Supplies:
- Design your rocket temple.
- Acquire heavy cardstock or the side of an old cereal box.
- Prepare coloring tools such as paint, markers, or crayons.
- Gather crepe paper streamers in vivid fire-like hues.
- Ensure you have scissors, glue, and a hole punch.
- Obtain string for hanging purposes.
- Find a suitable stick from your garden (we used a bamboo garden stake, but any stick will work).
Instructions:
- Begin by gathering all of your necessary supplies. Then, simply print or draw a rocket onto sturdy cardboard to ensure optimal flight.
- If you don’t have cardboard that can go through a printer, no worries! Print the rocket template onto plain paper and glue it onto the side of an empty cereal box before cutting it out.
- Once your rocket is cut out, let your creativity shine! Use paint, crayons, or markers to add vibrant colors. We recommend using liquid watercolors and cotton buds for a unique touch.
- Remember to color or draw on both sides of the cardboard to ensure a visually stunning rocket from all angles.
- To add some extra flair, glue streamers to the bottom of your rocket. We chose fluorescent red, yellow, orange, and pink streamers to create the illusion of flames bursting out.
- Keep the streamers long to create an impressive and swishy “tail” effect.
- After decorating your rocket and allowing it to dry, cut a piece of string approximately 30cm long. Punch a hole in the top of your rocket.
- Tie one end of the string to the rocket and the other end to a stick. To keep the string securely in place, wrap a piece of sticky tape around it and the stick.
Now, your rocket is prepared for takeoff!
Get ready to witness the awe-inspiring flight of your very own flying rocket. Enjoy!
#12 Solar System Craft
Supplies:
- Liquid Glue – Ensure a strong and sturdy bond for your creations.
- White Gel Pen – Add beautiful and fine details to your designs.
- Scissors – Cut with precision and create perfect shapes.
- Colored Papers – Choose from a variety of vibrant colors to bring your solar system to life: black, pink, red, orange, yellow, green, and blue.
Instructions:
- Prepare the background: Start by using black paper and draw curved lines to create a realistic space background.
- Create the planets: Take the time to go over each planet’s appearance, size, and unique features. Get creative and make them scale with each other.
- Make the sun: Craft your sun, keeping in mind its size and distinct characteristics.
- Arrange the planets: Once all the planets and the sun are ready, place them in the correct order in the background. Review with your kids to ensure accuracy.
- Add finishing touches: Take your craft to the next level by adding stars, comets, or other decorative elements to complete the scene.
With this step-by-step guide, you’ll have a visually appealing and educational Solar System craft in no time!
#13 Paper Plate Solar System
Supplies:
- Magnet Wand or Magnet
- Paper Plate
- Cardboard
- Colouring Pens
- Paperclip
Instructions:
- Begin by drawing the Sun in the center of the plate.
- Next, draw and cut out a picture of the Earth on cardboard.
- Carefully attach a paperclip to the Earth.
- Place the Earth with the paperclip on the front of the paper plate, and position a magnet behind it. You will be able to move the Earth around the Sun using the magnet.
- Get creative and add other planets to your model if desired.
Want to go further? Feel free to include other planets in your model!
Remember, not all metals are attracted to magnets. But fear not, the paperclip in this activity is made of steel, which is mostly iron and is attracted to the magnet.
Magnets have two poles, the north pole and the south pole. Depending on how you position them, they can either attract or repel each other. Just remember, opposite poles always attract.
#14 Outer Space Jewelry
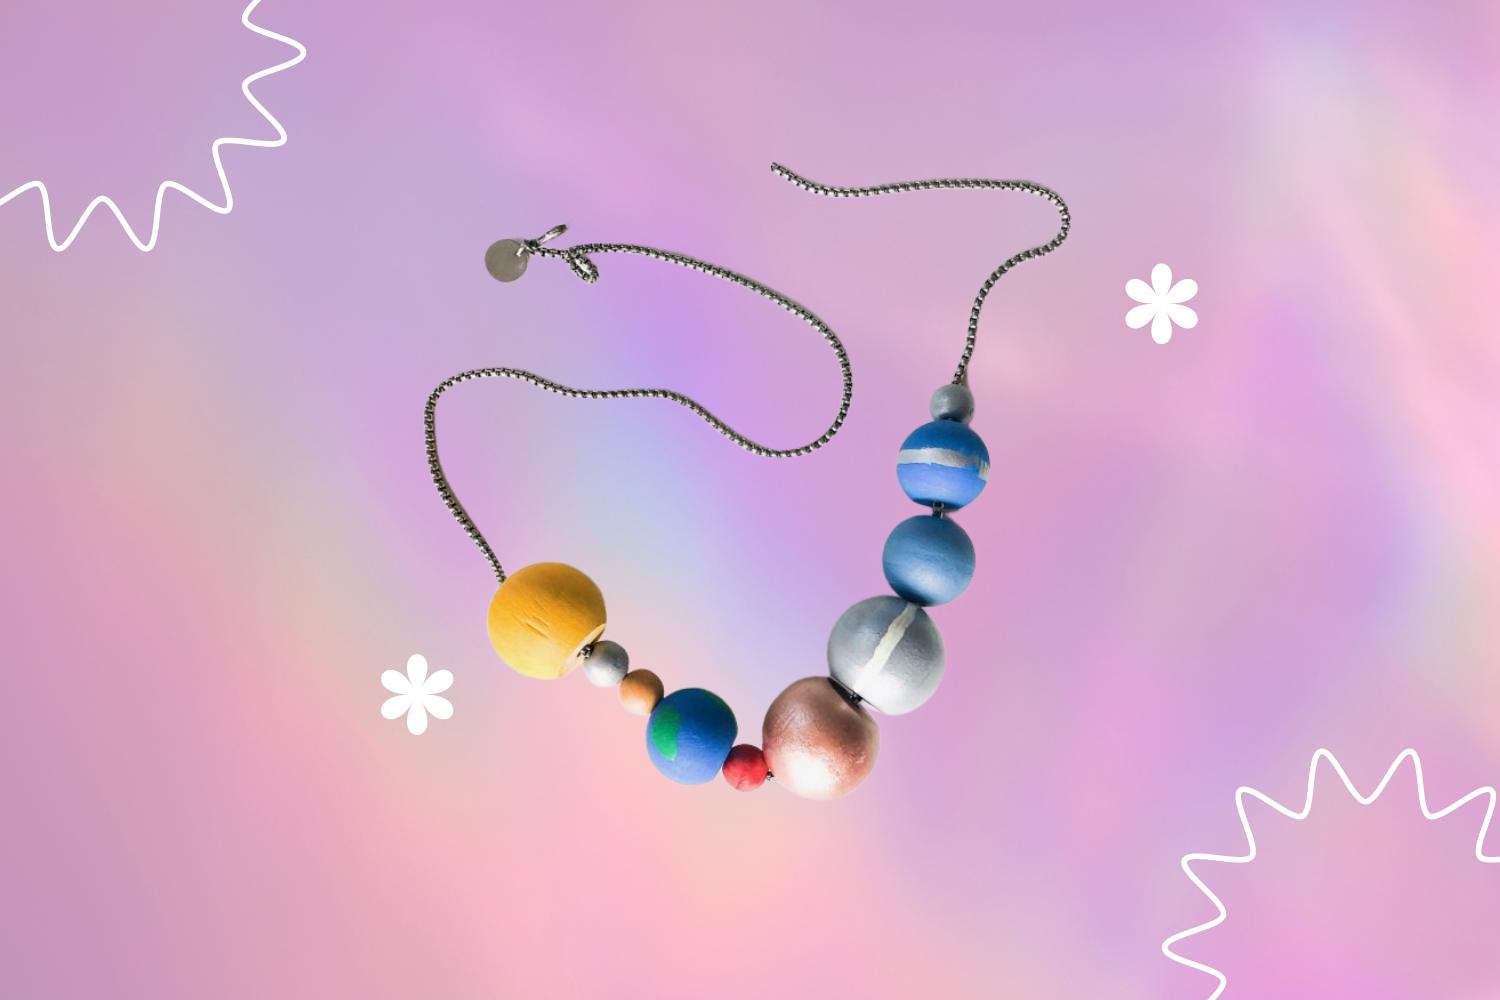
Materials:
- Assorted colors of Sculpey Clay, including Red, Yellow, Gold, White, Black, Purple, Blue, and Green.
- Skewer for shaping and detailing.
- Baking pan to bake the clay.
- Aluminum foil to prevent sticking.
- Cord for hanging the finished project.
- Optional: Extra star beads for additional decoration.
Instructions:
Step 1:
Start by making your Sculpey clay soft and pliable. It may be slightly hard and rectangular when you take it out of the package. Simply roll the clay in your hands until it becomes soft and flexible. This step may be a bit challenging for young children, so assistance may be needed.
Step 2:
When you look at pictures of planets and galaxies, you’re likely to notice the beautiful swirling colors. To recreate this effect, mix different colors of clay to create your beads. After a few twists, you’ll achieve a stunning blend of colors.
Step 3:
Once you have achieved the desired colors and effect, shape the clay into small balls and insert a skewer through them.
Step 4:
Prepare a baking dish by covering it with aluminum foil. Follow the instructions on the package to bake the beads, along with any other Sculpey creations. Remember that the beads will be hot when you take them out, but they will cool down and become solid. It’s like holding the entire solar system in the palm of your hand. Can you name all the planets?
Step 5:
Thread your planet beads in the order of the planets around the sun, along with your galaxy-inspired beads, to create a unique and fun design. Feel free to mix in other beads as well. Consider adding star-shaped beads for extra flair.
Tie the ends together, and you’ll have stylish space-themed jewelry. You can make necklaces or bracelets using a single planet or multiple planets. There are endless possibilities for customizing this project. Additionally, take the opportunity to quiz your children on the solar system as you create. It’s a fun and educational experience!
Conclusion
Consequently, these 14 fun space crafts for kids are educational and inspiring! They provide the perfect opportunity to foster imagination and develop creativity in your children. Not only do they allow them to explore science excitingly, but also reflect on their values and identity as part of society.
This is an invaluable learning process for young minds that will be remembered fondly throughout their lives. Activities like these provide joy through exploration and learning, which has surely been reinforced through these 14 creative activities.
After researching facts about planets or stars, constructing spacecraft out of recycled materials, or imagining a celestial body from scrap fabric, your children can use their imaginations to launch whatever destination they, please!
Thanks for reading our article. If you want to know more information, visit our website here.
Read more: