Get creative with your kids this fall season! Here are some fun and unique pumpkin crafts for kids that will keep them entertained for hours.
Fun Pumpkin Crafts For Kids
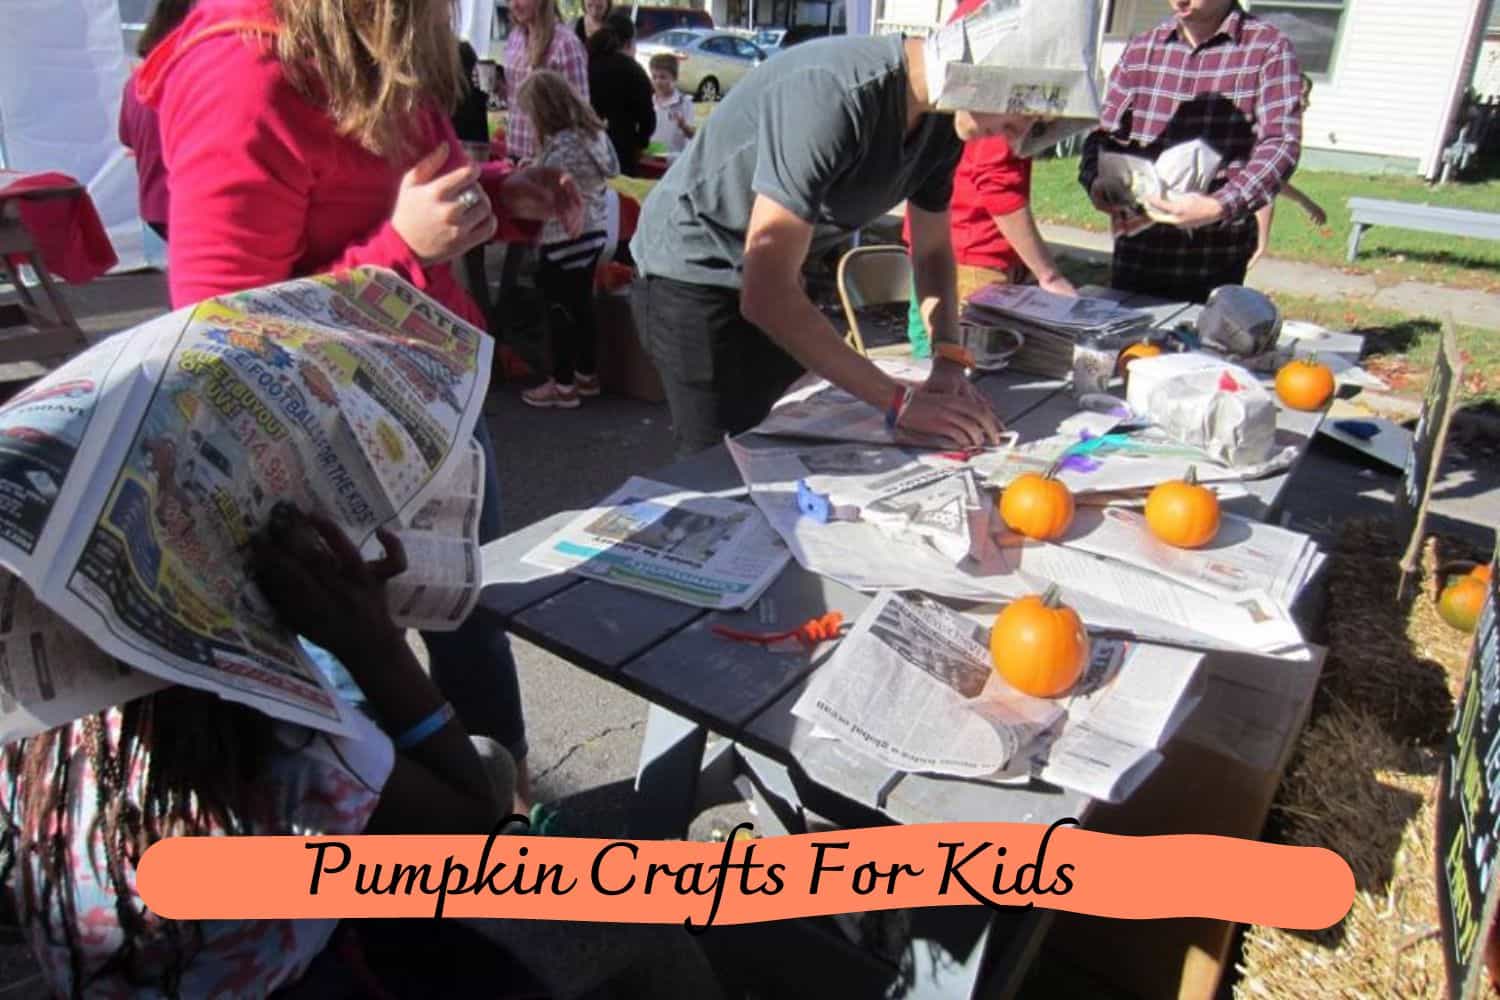
Do you want to get your kids into the fall spirit? There’s no better way than with some fun pumpkin crafting! Get your children ready for Halloween and Thanksgiving festivities by exploring these easy, creative, and enjoyable pumpkin crafts for kids.
From glittery pumpkins to paper plate luminaries, these projects will provide hours of entertainment for kids ages 3-12 while teaching them a valuable lesson in creativity.
Whether your little ones are experienced crafters or just getting started with arts & crafts, they’ll love decorating pumpkins in their style. So gather up those paintbrushes & crayons and carve out some time for a few simple seasonal projects!
Pumpkin Crafts for Kids Ideas
#1 Beaded Pumpkin Craft for Kids
Materials:
- 5 Orange pipe cleaners
- 1 Green pipe cleaner
- Orange pony beads
- Scissors (optional, in case you need to trim any excess material while wrapping the stem)
Instruction:
- Begin by twisting the pipe cleaners together at the center. While mine may not be perfectly centered, you’ll surely do a better job than I did.
- Enhance your pumpkin with beads! Add 12 beads to each “leg,” or increase to 15-20 if you have more beads available.
- Gather all the “legs” together, creating a cohesive structure.
- Create a stem by twisting the pipe cleaners together.
- Camouflage the orange pipe cleaners by wrapping the green ones around the stem.
- Achieve the perfect round shape for your pumpkin by gently pressing down on the bottom.
#2 Paper Pumpkin Favours
Supplies:
- Orange tissue paper
- Green tape (floral, electrical, or painters tape)
- Assorted candy
- 9″ cake pan
- Scissors
- Pencil
Instructions:
Create your adorable party favors with this simple tutorial!
- Start by stacking two pieces of tissue paper and tracing a circle. No need to worry about finding the perfect tool – any round object of similar size will work. Cut out the circles using sharp scissors, ensuring you have two identical pieces. To save time, you can stack up to 6 to 8 sheets of tissue paper.
- Next, place your favorite candy in the center of one of the circles. Begin with a small amount and experiment to find the perfect amount for a full, round appearance. It’s important to note that my first attempt lacked enough candy, resulting in a slightly droopy pumpkin.
- Now it’s time to assemble your pumpkin! Position the circles with the candy on top of your hand, gently bending the paper around the candy to create neat folds. Once you have the desired shape, gather the edges of the circle and twist them closed as best you can. Don’t worry – achieving natural-looking creases is easier than it seems. Just give it your best effort and they’ll turn out great!
- For the finishing touch, grab a small piece of green tape. Dollar store electrical tape, floral tape, or green painter’s tape all work well. Wrap the tape around the twisted end of the pumpkin top and twist it to create a stem-like appearance.
Voila! These cute mini pumpkin pinatas make perfect party favors. And the best part? When you open them up, you’ll find a delightful surprise inside – candy and maybe even a small gift!
#3 Stained glass pumpkin suncatcher
Materials:
- Colored cellophane
- Orange card
- Black paper
- Sticky back plastic (contact paper)
- Scissors
- Needle and thread (optional)
Instructions:
1. Begin by cutting out a pumpkin shape from an orange card. It’s helpful to sketch it in pencil first if you’re concerned about freehand drawing. Alternatively, you can use the template provided above as a guide.
2. Next, involve your child in the process. Stick the pumpkin shape onto some sticky back plastic.
TIP: Secure each corner with sellotape or washi tape to prevent contact paper from sticking to unintended surfaces, such as your toddler’s hands.
3. Additionally, cut out a “scary face” from previously painted black paper. If you have a black card available, feel free to use it for both the face and the pumpkin shape, as demonstrated in the accompanying video.
TIP: Prioritize sticking down the eyes and mouth of the pumpkin to ensure they are precisely positioned and securely attached.
4. Moving on, cut out shapes from cellophane to fill in the pumpkin. I suggest handling the majority of the cutting yourself if your child is still mastering scissors skills. However, this activity offers an excellent opportunity for them to practice.
5. To explore color mixing, go beyond the orange main section and also include red and yellow. It’s a great chance to illustrate how orange is created. If your child shows interest, encourage them to incorporate more of these colors.
6. Once your child deems the suncatcher complete, cover it with another piece of sticky back plastic to hold everything in place. This is how our pumpkin suncatcher turned out.
7. Finally, trim around the edge of the shape, and your stained glass pumpkin is ready to be hung in a window. Attach a needle and thread if you desire, or use a small loop of sellotape as an alternative hanging method.
TIP: If you prefer not to use a needle and thread, a piece of sellotape transformed into a small loop can securely attach your suncatcher to a window.
#4 Hanging Paper pumpkin craft
Materials:
- Orange construction paper or orange stock paper
- Green construction paper or green stock paper
- Brown construction paper or brown stock paper
- Stapler and staples
- String for hanging
- Scissors or paper cutter
Instructions:
- Begin by cutting a piece of paper into 1-inch strips.
- Take the 1-inch strips and cut them into the following lengths: 11 inches (x2), 9 inches (x2), 7 inches (x2), and 6 inches (x1).
- Note that each piece of paper will create one pumpkin.
- Assemble the pumpkin by arranging the strips. Start with the 6-inch strip in the middle, then sandwich the other strips from smallest to largest. Make sure the tops are aligned and secure them with a staple.
- Align the other end of the strips, making sure it is flush, and staple.
- Cut out some leaves and a stem for your pumpkin. Curl the stem around a pencil.
- Attach the leaves and stem to the pumpkin using staples.
And there you have it – your very own paper pumpkin!
Create a festive fall decoration with this easy-to-follow tutorial on making a paper pumpkin.
#5 Mason Jar Pumpkin
Materials:
- Mason Jar
- Orange tissue paper
- ModPodge
- Black construction paper
- Sponge brush
Instructions:
- Cut the tissue paper into squares.
- Glue the tissue paper squares onto the desired surface using ModPodge.
- Apply an additional layer of glue on top.
- Attach the eyes, mouth, and optionally, a nose.
- If desired, draw the design on black construction paper and cut it out.
- Once the artwork is dry and the sun sets, insert a tea light or flameless candles to observe the glowing effect.
#6 Toilet Paper Roll Pumpkin Box

Supplies:
- Cardboard tube
- Kraft paper or similar material
- Pencil
- Scissors
- Ruler
- X-Acto knife
- Craft glue (Tacky glue is recommended, but hot glue can be used by adults for the stem)
- Orange Acrylic paint
- Paintbrush
- Dry twig
- Optional: green crepe paper
Instructions:
Looking for a creative and cost-effective way to make a pumpkin box? Look no further! Follow these easy steps to transform a simple toilet paper roll into a unique and festive container.
- Start by marking the toilet paper roll with a ruler in the desired spots for cutting. This will determine the height of both the box and lid.
- Next, carefully cut out the designated parts for the box and lid using an X-acto knife.
- Take a piece of Kraft paper and trace the diameter of the toilet paper roll twice – once for the bottom of the box and once for the top of the lid.
- Cut a long strip from the Kraft paper, making sure the width is equal to the combined height of the box and lid. The length of the strip can be of any measurement.
- Roll and insert the strip into the cut-out portion of the cardboard tube that forms the box. Make sure the bottom end aligns with the base of the roll. Use a pencil to mark the edge where the strip overlaps with the main part, then trim it to the correct size.
- Apply craft glue to the inner surface of the box.
- Carefully roll the Kraft strip and place it inside the box, pressing it against the inner surface to ensure a secure attachment.
- Cut out the two circles traced in Step 3. Attach one circle to the bottom side of the box and the other to the lid of the toilet paper roll.
- Apply one or two coats of orange acrylic paint to the entire pumpkin box. Allow the paint to dry completely.
- Complete the look by attaching a small dry twig to the center of the lid. For extra flair, add crepe paper leaves.
If desired, you can add a pop of green by incorporating a crepe paper leaf or two. The options are endless!
We’d love to hear from you. What will you be using your toilet paper roll pumpkin box for? Share your favorite ways to craft with cardboard tubes in the comments below!
#7 Yarn Pumpkins
Supplies:
- Balloon
- Orange yarn
- White glue
- Pipe cleaners (in brown and green colors)
- Tape measure
- Scissors
- Plastic fork
Instructions:
Step 1: Gather Your Materials
Make sure you have everything you need before starting.
Step 2: Get ready with the balloons and glue
- Blow up 12″ balloons halfway for the desired shape
- Cut about 21 pieces of yarn, about 36 inches long
- Pour glue into a small bowl (one 2-ounce bottle per yarn pumpkin)
- Tie yarn to balloon and hang it from a kitchen cabinet handle
Step 3: Dip yarn in glue and wind around the balloon
- Dunk yarn in glue and swirl gently with a fork to cover it
- Remove excess glue by running the yarn through the fork
- Press one end of the yarn on the balloon and wind it around, securing the ends
Step 4: Allow to Dry
Hang the yarn-covered balloons to dry. Protect surfaces underneath from glue drips. It takes about 24 hours for them to fully dry.
Step 5: Remove the Balloon
Carefully detach the yarn from the balloon by pressing your fingers underneath. Create a small hole near the knot to release the air slowly. Pull out the deflated balloon through one of the openings in the yarn.
Step 6: Add Stem and Tendrils
Wrap pipe cleaners around your finger to create a spiral stem. Tuck the end of the pipe cleaner into the yarn. No need to glue. Your yarn pumpkin is now complete!
Try this fun and easy craft project today!
#8 Pumpkin Stress Balls
Create these adorable stress balls (or even cornhole bags) with just a few supplies: rice or flour, orange balloons, and a marker.
It’s as easy as filling the balloons with rice and adding a cute face. Get ready to relieve stress and add a touch of cuteness to your day!
#9 Sweater Pumpkins – No-Sew
Supplies:
- Old sweaters (easily found at your local thrift store) – any size or type will work
- Embroidery thread or twine (I recommend using this thread for best results)
- Fiberfill or sweater scraps (used for stuffing)
- Hot glue gun
- Scissors
Instructions:
- Choose your desired size for the sweater pumpkin – small, medium, or large. For my tutorial, I made two small and one medium sweater pumpkin. Refer to the sweater “pumpkin carving” chart below to determine where to cut your sweater for the specific size pumpkin you want to create.
- Cut your sweater according to the size of pumpkin you want. If you’re making small pumpkins, you can also use the upper arm of your sweater (above the cut shown in the chart).
- Turn the cut portion of the sweater inside out.
- If you’ve cut out a piece for a medium-sized pumpkin or if your large-sized pumpkin piece is a rectangle instead of a tube (which can happen when cutting up cardigans), you’ll need to glue the side closed before proceeding. Apply hot glue to one short edge of your sweater piece and match it up with the other short edge, pressing lightly. You aim to create a tube. Allow the glue to set.
- Take a long length of embroidery thread or twine (at least two yards) and securely close the bottom of the sweater tube by tightly knotting it. If you’re making a smaller pumpkin and have a cuff, close and tie the other end of the tube.
- Apply a generous amount of hot glue to the bottom edges where you’ve closed the tube with thread. Allow the glue to set.
- Now, turn the sweater right side out and ensure that the thread is coming out from the top, creating what is essentially a sweater sack.
- Stuff your pumpkin with fiberfill or your preferred type of stuffing. You can also use sweater scraps.
- Next, cut a small notch next to the seam at the top edge of your sweater. For a small pumpkin, cut 1 inch; for a medium pumpkin, cut 2 inches; and for a large pumpkin, cut 3 inches. This cut will provide a place for your thread to come out without needing to fold over the edge of your sweater.
- Gently tug on the thread so it emerges from the notch you cut in your sweater. Do not pull the thread out completely, just allow it to hang out.
- Gather the top edge (1 inch for small, 2 inches for medium, and 3 inches for large) and wrap the thread around the base of the gathered section a few times to secure it. This top section will eventually become the stem of the pumpkin.
- Begin wrapping the thread from the top to the bottom and back up again, creating the segmented pumpkin shape. Repeat this at least twice in the same spot, pulling tightly each time. Divide the wrapping into several sections and ensure the thread is going exactly where you want it. If needed, you can wrap the thread around the stem a few times before wrapping it around the entire pumpkin to anchor it at the top.
- Once you are satisfied with the segments formed by the tight thread, continue wrapping the thread around and up the stem.
- When you’re pleased with the appearance of the stem, tie or glue the loose end of the thread.
- Adjust the pumpkin to your preferred sitting position. You can leave it as is or embellish it. Let’s add some leaves.
- Cut small leaves from another old sweater in a complementary or contrasting color, and glue them to the top of your pumpkin.
#10 No-Sew Pumpkin and Skeleton Bracelets
Supplies:
- Vibrant Orange Tissue Paper
- Sturdy Paper Plates (for this craft, we recommend using high-quality plates that maintain their shape)
- Orange Paint
- Clear Contact Paper
- A reliable pair of Scissors
- Clean and Dry Pumpkin seeds
- Lengths of Yarn
- Green and Brown Craft Paper
- Tape or Stapler (to secure materials)
Instructions:
- Start by cutting out a circle in the middle of a paper plate to create a pumpkin shape.
- Next, have your child paint the back of the paper plate orange and set it aside to dry.
- Cut out a piece of contact paper that is big enough to cover the circle. Don’t remove the backing yet.
- Place the painted side of the paper plate facedown on a table. Then, carefully place the contact paper inside the plate, with the sticky side facing up towards you.
- Remove the backing from the contact paper and secure it in place with tape or a stapler.
- Now, have your child stick pumpkin seeds onto the contact paper.
- Next, they can add pieces of yarn to represent the fibrous strands inside pumpkins.
- To secure everything in place, have your child place a piece of orange tissue paper over the seeds and yarn.
- Finally, have your child cut a stem out of brown paper and a leaf out of green paper. They can then attach them to the top of the pumpkin with tape or a stapler.
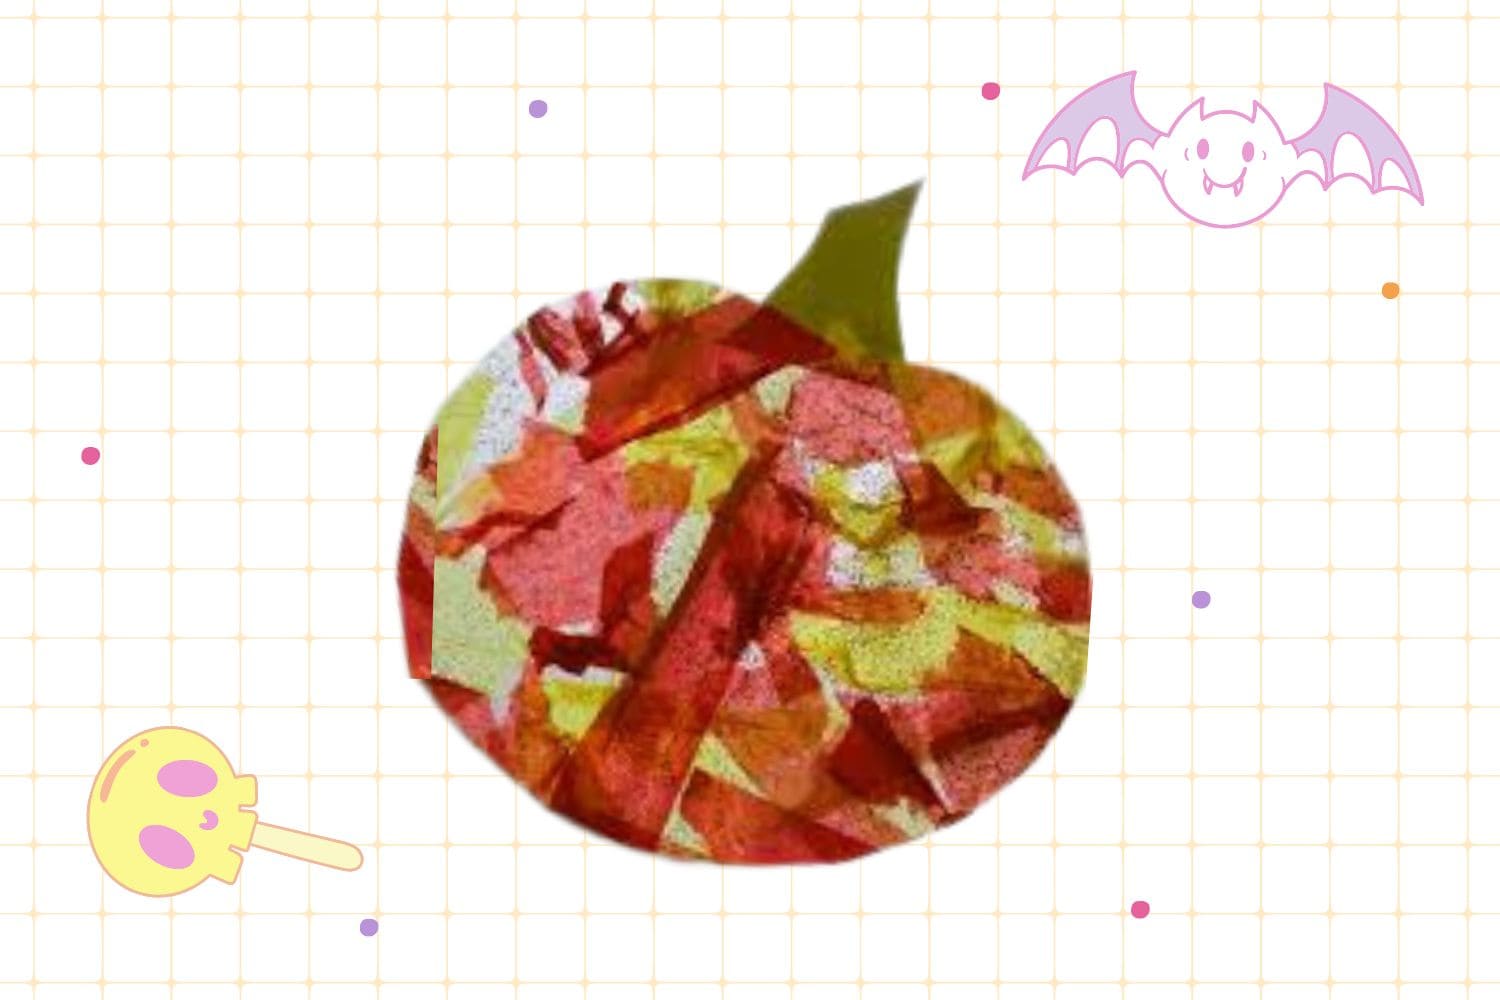
#11 Tissue Paper Pumpkins: Color Mixing Pumpkin Collage
Materials:
- Clear contact paper
- Scissors
- Painter’s tape
- Red and yellow tissue paper
- Glitter (optional)
- Green paper
Instructions:
- Secure a large sheet of sticky contact paper to a table, creating a sticky surface.
- Engage your toddler in tearing red and yellow tissue paper into small pieces, then encourage them to stick the pieces onto the contact paper until it is filled.
- Help your child flatten the tissue paper pieces by gently pressing them down. Next, cover the tissue paper with a second sheet of contact paper, making sure the sticky sides are facing each other.
- To create pumpkin shapes, cut the contact paper into circles and add a stem using green paper. If there are uncovered areas, simply cut smaller pumpkins from the filled sections.
- Hang the pumpkins up against a window to witness the beautiful effect created when the red and yellow tissue paper pieces overlap.
Get ready for a fun and visual craft activity with your toddler! Make adorable tissue paper pumpkins that will bring joy and creativity to your home décor.
#12 Quilled Pumpkin Halloween Craft For Kids
Supplies:
- Quilling paper strips
- Craft paper in white, pink, and orange
- Black Sharpie
- Craft glue
- Slotted quilling tool
- Scissors
Instructions:
- Coil a 20-inch long quilling strip using a slotted quilling tool.
- Create three shapes with three small (3-inch) green quilling strips – a loose coil, a teardrop shape, and a lens shape.
- Cut out two round pieces from white craft paper and draw the outlines and eyeballs using a black Sharpie. Cut a mouth pattern from pink craft paper.
- Trace the outline of a pumpkin onto orange craft paper using craft glue, making sure it matches the size of the loose coil from Step 1.
- Place the loose coil onto the glued area of the orange craft paper. Adjust the outer end of the loose coil along the outer end of the pumpkin shape.
- Carefully cut along the outer edge of the coils on the orange craft paper.
- Glue the teardrop shape on the top middle part of the coiled pumpkin. Also, glue the loose coil on one side of the teardrop shape and the lens-shaped piece on the other side.
- For the finishing touch, glue the eyes and mouth onto the quilled pumpkin in their appropriate places.
Conclusion
So you’ve read all 12 of our fun pumpkin craft ideas to do with the kids this fall. We hope that your family had a blast creating some unique things with pumpkins and being able to enjoy all that the season has to offer.
Fall is such a special time of year, and we’re grateful for each moment spent decorating pumpkin after pumpkin with our loved ones. From painting them in sparkly colors to carving spooky faces into them, your children will remember what these crafts meant for them during this autumn season.
Whether they’ll turn them into creative works of art or turn them into a centerpiece on their living room table or front porch, one thing is certain — those memories will be treasured for years to come. Let the minor mess of paint relate to future treasured memories!
Thanks for reading our article Pumpkin Crafts For Kids. If you want to know more information, visit our website here.
Read more:
How to Carve a Pumpkin: Easy Tips and Techniques – wikiHow