Looking for fun and creative activities to do with your children this spring? Check out our list of the best easy-to-make spring crafts for kids!
Fun & Easy Spring Crafts for Kids
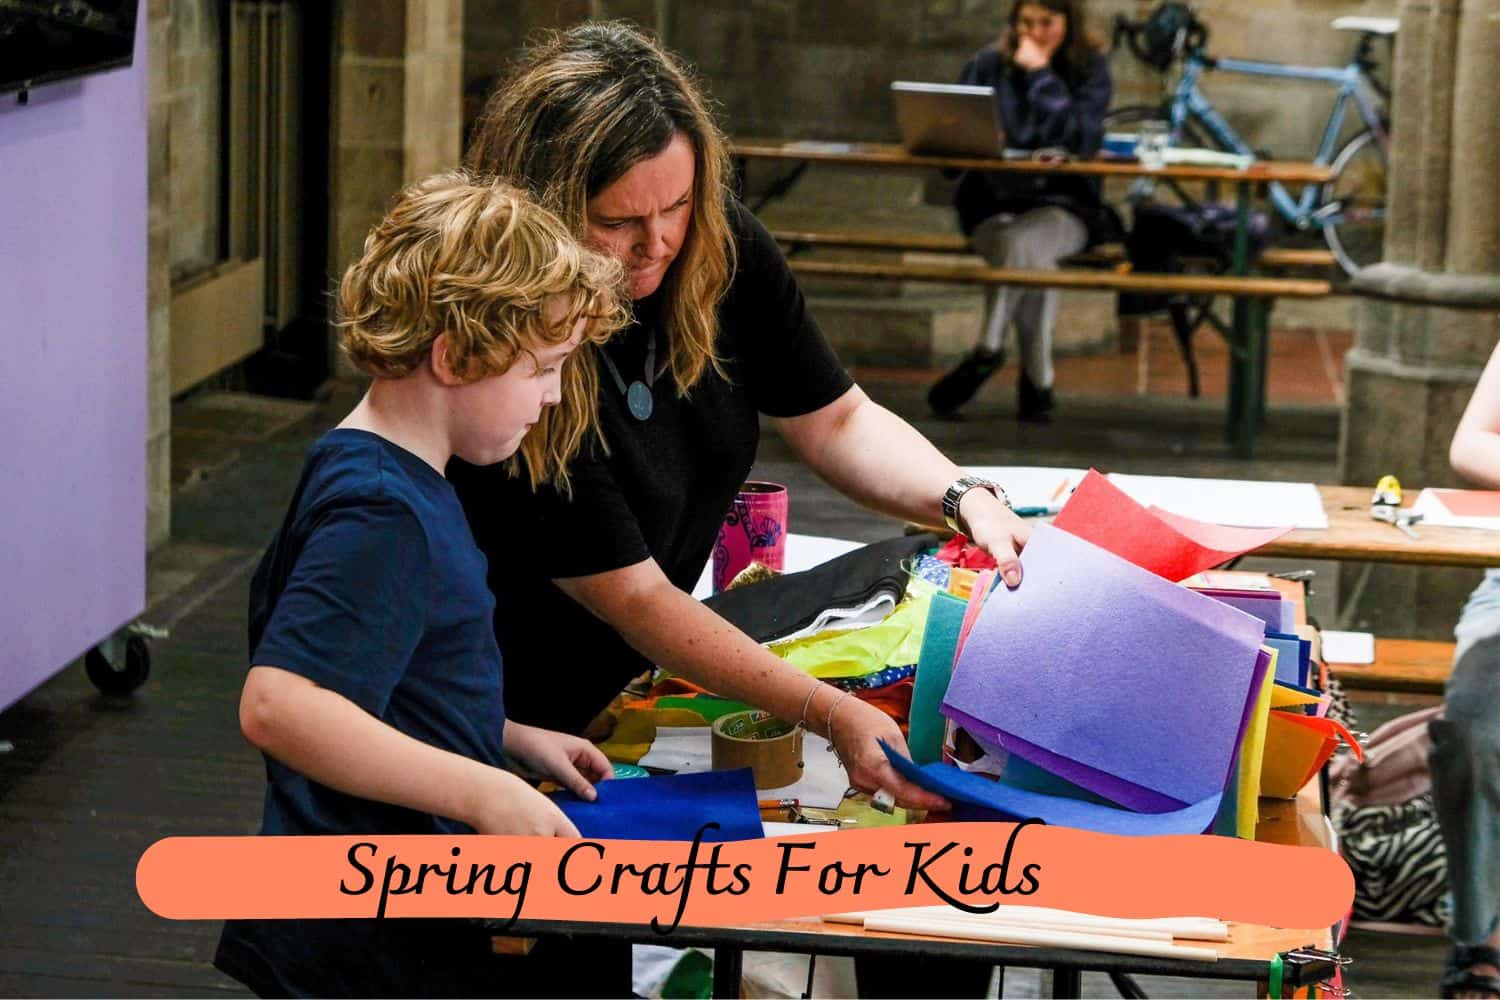
As the days start to get longer and warmer, we know spring is just around the corner! It’s a great time of year for getting creative with your family, especially if you have young kids at home.
Crafting projects are a wonderful way to help liven up those rainy or cool days in this transitional season – think felt flowers, papier mache sun catchers, nature collages and so much more!
To help give you some inspiration (and maybe avoid crafty meltdowns), here are some simple yet fun spring crafts for kids that will help keep your children busy this season.
Spring Crafts For Kids Ideas
#1 Watercolor Doily Banner
Supplies:
- 10″ circular paper doilies
- Liquid watercolor paints
- A length of twine
Instructions:
- Create a vibrant and visually stunning banner using doilies and watercolor techniques.
- Place paper towels underneath the doily before painting to keep the colors vibrant. If you prefer a softer and tie-dyed effect, moisten the doily before painting.
- Allow the doilies to dry completely before moving on.
- To assemble the banner, fold the doilies in half and lay them over a length of twine.
#2 Toilet Paper Roll Flowers Craft
Supplies:
- Toilet Paper Rolls
- Green Craft Paint
- Foam Paint Brush
- Colored Cardstock
- Glue Stick
- Green Glitter
- Pom Poms
Instructions:
- Transform plain toilet paper rolls into beautiful flowers with just a few easy steps.
- Begin by painting the rolls with a lush green hue and allow them to dry completely.
- Cut out leaf shapes from green construction paper, approximately 4″ long. For an added touch of sparkle, sprinkle glitter on smaller leaves made from lighter green paper and affix them onto the larger ones using glue.
- Glue the leaves onto the front of the decorated toilet paper rolls.
- Get creative by cutting out various flower shapes like tulips and daisies from colorful paper.
- Enhance the daisy-shaped flowers by attaching charming pom poms.
- On each side of the toilet paper roll, create a small half-inch slit to easily slide the flowers into.
Now, proudly display your unique and delightful flower garden! These enchanting creations make a lovely addition to any window sill, and are even perfect for gifting on Mother’s Day!
#3 Cherry Blossom Art
Supplies:
- Color cardstock for a vase
- Light color construction paper (12” x 18”)
- Color marker to decorate the vase
- Black paint
- Paintbrush
- Dark pink tissue paper squares
- Light pink tissue paper squares
- School Glue
- Scissors
- Glue stick
Instructions:
- Create your unique vase on a piece of white cardstock.
- Feel free to design the vase however you like!
- For young children, it may be helpful to lightly sketch their design with a pencil first. Once they’re satisfied, they can trace and color it in.
- Once you’ve finished decorating the vase, carefully cut it out with scissors.
- Use a glue stick to apply glue to the back of the vase. Attach it to the bottom of a vertical, light-colored piece of construction paper (12″ x 18″). Leave space at the top for the cherry blossom art.
- Using black paint and a paintbrush, draw cherry tree branches extending from the top of the vase. Acrylic paint is recommended, but tempera paint works too. Allow the black paint to dry completely.
- For a fun alternative, you can create cherry blossom branches using a blow painting technique. Simply add small dots of thinned-out black paint on the paper and blow it upward to form the branches.
- Cut squares of tissue paper from light pink and dark pink tissue paper.
- Once the black paint is fully dry, use school glue to add dots along the cherry tree branches for the blossoms.
- Crumple the light and dark pink tissue paper squares to give them a realistic look of cherry blossoms. Place them on the dots of glue.
#4 Caterpillar Pom Pom Craft
Supplies:
- Abundant pom poms
- Playful googly eyes
- Vibrant green construction paper
- Reliable white school glue
- The bold dark green marker
- Handy pair of scissors
Instructions:
- Begin by drawing a leaf on green construction paper.
- Cut out the leaf shape.
- Use white school glue to create an “S” shape on the leaf.
- Start placing small pom poms along the glue line.
- Attach two goggle eyes to a larger pom pom, and then glue the large pom pom onto the leaf.
- Congratulations! You have completed your caterpillar pom pom craft.
#5 Paper Ladybug Craft
Supplies:
- Red and black paper (with a hint of white)
- Scissors
- Stick glue
- Black marker
Instructions:
- Start by cutting a circle shape out of the red paper to serve as the base.
- Cut several strips of red paper.
- Take one strip and attach it to the base using glue, following the picture as a guide.
- Glue the next strip onto the base, but make sure it is positioned at a 90° angle to the first strip.
- Continue this process with the next two strips, placing them between the first two.
- Depending on the desired size of your ladybug, you can add more strips to make its body fuller.
- Cut out black paper dots using a glue cap as a template.
- Also, cut a half-circle shape for the head and two antennae.
- Cut two small oval shapes out of white paper and draw the eyes using a black marker.
- Attach the dots and head to the ladybug’s body using stick glue.
Follow these steps and unleash your creativity to make a charming ladybug that will surely captivate anyone who sees it.
#6 Marbled Pots Planting Crafts for Kids
Supplies:
- Terra cotta flower pots
- Acrylic paint in a variety of colors
- Water.
Instructions:
- Transform plain cups of water into vibrant creations by adding paint colors. For a pristine white color, use a plastic container.
- Unleash your creativity by swirling the colors with a paintbrush. But be careful not to mix too thoroughly, as you want a mesmerizing swirl effect, not a muddled mess.
- To transfer the enchanting marbled pattern onto a terra cotta pot, lightly roll it on the surface of the paint in the plastic bin. Remember, just skim the pot over the paint, rather than pushing it down.
- For a visual guide on how to achieve stunning results, check out our video demonstration.
#7 Nature art bugs
Materials:
- Recycled heavy cardboard squares (random sizes)
- Acrylic paint
- Tacky craft glue (ordinary craft glue may not hold well enough)
- If tacky craft glue is not available, blu-tack can be used as an alternative
- Mod podge
- Hole punch
- Paintbrush
- Assorted leaves, sticks, and twigs from the garden in various shapes and sizes
Instructions:
- Begin by painting a square of cardboard with acrylic paint. Allow it to dry completely.
- Arrange various nature items, such as leaves or twigs, on the painted square to create the desired insect design.
- Carefully remove the items from the square and secure them in place using tacky craft glue.
- Once the glue is dry, apply a layer of mod podge over the entire design to enhance its durability and finish.
- To add an eye to your insect artwork, punch a hole in a leaf and use the circular piece you’ve removed as the eye. Alternatively, find a naturally occurring round shape from nature to serve as the eye.
Create a stunning insect-inspired masterpiece with this easy-to-follow guide.
#8 No-sew felt flowers
Supplies:
- Felt in various sizes and shapes, easily cut with a Die or by hand with scissors
- Assorted buttons to add a pop of color and flair
- Felt glue for secure and long-lasting attachment
- Wooden skewers painted green, or alternative options like green paper drinking straws or floral wire
- Green ribbon for a finishing touch
- A low-temperature glue gun for hassle-free assembly.
Supplies:
- Choose 3 to 5 felt pieces in your desired colors and sizes.
- Layer the felt pieces, starting with the largest on the bottom.
- Apply a dot of glue to the center of each layer to hold the flower together.
- Avoid gluing to the outer edges for a more dimensional look.
- Enhance the center of each flower by gluing on a colorful button or layering different-sized buttons.
- Attach a wooden skewer or paper straw to the back of the flower as the stem.
- Use hot glue for a strong and quick hold (remember safety precautions!).
- Tie a short length of green ribbon to the skewer to create leaves.
- Bundle your flowers together and place them in a vase.
- If your vase has a wide mouth, use floral foam or playdough to secure the stems.
Enjoy your stunning felt flower arrangement!
#9 Paper plate veggie garden craft
Supplies:
- Paper plate
- Blue and brown paint
- Brown yarn
- Cardstock paper in green, orange, red, and beige
- Paintbrush
- Plastic yarn needle
- Hole punch
- Scissors
- Glue
- Tape
Instructions:
- Grab a paper plate and start by painting one-half blue and the other half brown. Allow the paint to dry fully.
- Once the paint is dry, use a hole punch to create holes along the rim of the brown-painted half of the paper plate.
- Cut a piece of brown yarn and thread it through a plastic yarn needle. Tie one end of the yarn to the needle and tape the other end to the back of the paper plate.
- Begin threading the yarn through the holes in the paper plate. You can go through the holes once or multiple times, depending on your preference. Continue threading until you reach the end of the yarn. Secure the end of the yarn to the back of the plate with tape.
- Set the paper plate aside for now and grab the corresponding colored paper for each vegetable. Use the cut veggies as a template to trace and cut out veggie shapes. The leaves should be made from green paper, while the carrot should be made from orange paper, the beet from red paper, and the onion from beige paper.
- Glue the leaves to the back of each veggie, creating a more realistic look.
- Finally, it’s time to plant your veggies! Place the paper plate garden in a dirt-filled container and enjoy the process of cultivating and harvesting your homemade vegetables.
#10 Pipe Cleaner Daffodil
Materials:
- 3 yellow pipe cleaners
- 1 green pipe cleaner
- 1 orange pipe cleaner
- PVA (white) glue
For the best results, I recommend using 15 cm pipe cleaners when making the Daffodil Flowers. Using longer 30 cm pipe cleaners can result in a heavier and larger flower head. If you choose to use longer pipe cleaners, be sure to secure the head with a larger twisted green pipe cleaner stem to provide extra support.
Instructions:
- Bend the yellow pipe cleaners in half to locate the middle point.
- Open them back up, but not completely, and twist them together in the middle to form a six-point star.
- Roll the end of each pipe cleaner into a snail shape, resulting in five petals.
- Remove the straight section of the sixth pipe cleaner.
- Insert a green pipe cleaner through the center of the flower and secure it with a twist at the back.
- Curl the orange pipe cleaner to create the center cup of the daffodil.
- Apply glue to hold it in place and allow it to dry. Tacky white glue or a hot glue gun will work.
These beautiful flowers can be used as home decorations or given as thoughtful gifts for occasions like Mother’s Day, to teachers, or friends.
#11 DIY Paper Kite
Materials:
- Two wooden dowels: 1/4″ and 1/8″ in diameter, cut to 33″ and 24″ lengths respectively
- 36″ wide sheet of paper or multiple smaller sheets taped together for a larger surface area
- Apple Barrel acrylic paints
- Twine for stability
- Tape for secure attachment
- Ribbon or fabric scraps for decorative touches
- Optional: Mod Podge Washout, stencils, and patterned paper for added embellishment.
Instructions:
- We initiated the process by painting the large sheets of paper with abstract spring motifs (depicting rain puddles and grass in the photo above, in case you were curious!). Ensure the use of an apron or art smock to safeguard your attire when working with acrylic paint. However, the delightfully messy hands and brushes should be embraced as part of the enjoyable process! I like to keep a stack of baby wipes within reach to address any messy fingers.
- The stencils were extremely popular, and I was thoroughly impressed by how quickly the boys grasped the concept that only a small amount of paint on their sponsor was needed for optimal results.
- We experienced a spontaneous lesson on color mixing, resulting in wonderful full-spectrum paint palettes, despite starting with only five initial paint colors. Although the paint line offers a wide variety of colors, it can be fun to experiment with your combinations!
- To construct the kite frame, tie the two dowels together as demonstrated above, and if necessary, reinforce the joint with hot glue. Create the perimeter by tying a single length of twine from one end of the dowel to the other. I wrapped the twine a few times at each end and secured it with hot glue.
- Place the kite frame on top of the painted artwork and trim the paper to fit. Leave a 2″ border around the kite frame for folding and finishing purposes.
- Begin by folding the corners inward and securing them with tape. Next, fold the side seams over the twine and secure them with tape along the entire length of the fold.
- The following step is best understood through visual aids, so please refer to the photos to illustrate what I mean. Locate the midpoint of the two sections of the longer dowel and use scissors or a craft knife to create a small slit in the kite at those points. You may want to reinforce the holes with a small piece of tape on each side of the kite.
- Fasten a length of twine to the dowel at the first slit and thread the string through the slit to the front side of the kite. Thread the string back through the other slit and secure it by tying it to the dowel on the back side of the kite. Ensure that the string is not tightly pulled on the front side of the kite, but instead has some slack to create the kite’s bridle.
- Tie the string that will be used to fly the kite to the center of the bridle and attach ribbons or fabric scraps to form the kite’s tail.
Congratulations! You’re all set and ready to fly!
#12 Clouds and Rain Weather Windsock Craft
Materials:
- Blue construction paper
- Cotton balls
- Blue or white yarn
- Pipe cleaner
- Scissors
- Hole punch
- Glue
- Tape
Instructions:
Preparing:
- Start by gathering all the necessary materials. Cut the yarn into 2-foot sections for easier handling and flexibility. You can also use smaller pieces, as long as they are between 1-2 feet in length.
- Save time by pre-cutting the raindrops. Create a raindrop shape template and cut multiple raindrops from light blue construction paper. Fold the paper into a small square to cut many raindrops at once.
- Consider pre-punching the holes along the bottom edge of the paper, as well as two holes on the top. However, if you want to involve your preschooler, you can let them do the hole punching. Remember that the strings will be doubled up, so if you punch 6 holes, there will be 12 raindrops. Adjust the number of holes based on the desired difficulty level.
Completing:
- This activity can be done all at once or split into multiple steps throughout the day.
- Start by making the clouds. Pull and spread the cotton balls, then glue them onto a blue piece of construction paper. This provides a great fine motor activity for students. You can take a break while waiting for the glue to dry, although it’s not necessary as the cotton balls stay on well.
- Next, roll the paper into a tube and secure it with tape. Younger children may need assistance with this step.
- Once the tube is made, use a hole punch to create holes along the bottom of the windsock, unless it was already done in preparation.
- Thread the yarn through each hole. No need to tie knots, as the raindrops will be attached to each end of the yarn.
- This activity turned out to be an excellent fine motor exercise as my preschooler carefully poked and pulled the yarn through the holes!
- After threading the yarn, glue a raindrop to the end of each piece of yarn.
- To complete the craft, insert a pipe cleaner through each top hole of the windsock and bend the ends to secure it.
#13 Candy-Filled Easter Egg Carton Chicks
Supplies:
- Empty egg carton
- Yellow paint
- Construction paper
- Tape
- Glue
- Black marker
Instructions:
- Create two sections by cutting out portions of the egg carton.
- Separate the sections and ensure that the edges are even by trimming them.
- Trim the edges until the two pieces of the egg carton can securely close without any gaps.
- Apply small pieces of tape to both sides of the egg carton to allow for easy folding.
- Open the egg carton and begin painting the inside. This will prevent the need to hold onto wet paint with your fingers.
- Turn the carton over and paint the outside. It is recommended to use non-toxic paint since candy will be added inside.
- Apply at least two coats of paint for good coverage.
- Make wings and a beak using construction paper, card stock, or any paper available. Cut out two yellow triangles for the wings, with one end extended for gluing, and two orange triangles for the beak.
- Apply white glue to the paper pieces and firmly press them onto the inside of the egg carton. The beak pieces should be attached as shown.
- Apply glue to the yellow triangles and attach them to both sides of the bottom egg carton pieces to create the wings.
- Use a thin-tipped magic marker to draw two black dots above the beak for the eyes. A Sharpie with a “brush” tip is recommended.
- Cut out feet from orange paper, attempting to match the shape shown.
- Finally, glue the feet to the bottom of the egg carton and your adorable candy-filled Easter egg carton chicks are complete!
Conclusion
Springtime is one of the most exciting times of year for kids and crafting can help enhance their experience. With these 13 spring crafts, you can enjoy fun activities that not only keep your children entertained but also allow them to express their creativity in unique ways.
By introducing children to creative projects, there are countless opportunities for learning while having a good time. Start now by getting some supplies and letting your kids unleash their imaginations!
Who knows what creative ideas they come up with next? Whether you decide on a paper art or nature craft project, the important thing is that your child has fun and gets to explore his or her creative side. So this season, let’s get crafting together and have some family fun!
Thanks for reading our article Spring Crafts for Kids. If you want to know more information, visit our website here.
Read more: