Looking for a fun and creative way to engage your kids? Check out this guide on how to make puppets with paper and start making memories today!
Create Your Puppets with Paper | How To Make Puppets With Paper
Are you looking for a fun way to ignite your children’s creativity? Then look no further than making paper puppets! This craft is easy, affordable, and perfect for indoor activities—and better yet, it won’t require too much time or effort.
Making paper puppets can be an enjoyable family activity where everyone can come together to bring characters alive with imagination and some simple supplies from around the house.
So move aside traditional toys and gather those leftover pieces of construction paper because it’s total puppet-making mayhem! Keep reading our blog post to learn how to make puppets with paper like cardstock, strings, googly eyes, and other materials you may already have lying around.
What Are Paper Puppets?
Paper puppets are an art form that allows you to create characters by drawing, coloring, and cutting paper pieces.
These puppets can be used for storytelling, imaginative play, or even as a prop for school projects. What makes them so fun is the endless possibilities of shapes, sizes, and designs that you can create with just paper.
Benefits of Making Paper Puppets
Apart from being a fun and creative activity, making paper puppets has numerous benefits for children. It helps to improve their fine motor skills by practicing cutting and gluing.
It also encourages imaginative play, storytelling, and role-playing, which can enhance their communication and social skills. Moreover, making puppets with paper is inexpensive and eco-friendly compared to buying plastic toys.
Different Types of Puppets You Can Create with Paper
The best part about making paper puppets is that you can let your imagination run wild and create any type of puppet you want! Here are a few ideas to get you started:
- Finger Puppets: These are small puppets that fit on one finger and involve minimal cutting and gluing. They’re perfect for young children.
- Hand Puppets: These are larger puppets that fit over your entire hand and involve more cutting and gluing. They’re great for storytelling and imaginative play.
- Stick Puppets: These involve attaching paper characters to popsicle sticks or straws, making them easy to move and manipulate. They’re perfect for creating a puppet show!
- Shadow Puppets: These use light to create silhouettes of characters, which can be projected against a wall or screen. They’re great for storytelling and creating dramatic effects.
How To Make Puppets With Paper?
Method 1: Create a Folded Paper Hand Puppet
Supplies:
- Color papers
- Glue
- For decorating (optional): crayons, markers, or paint, 3D decorations like ribbon, paper, or googly eyes, gems, or popsicle sticks, etc.
Instructions:
Step 1:
Fold a 12 by 18 inch (30 by 46 cm) piece of construction paper into thirds lengthwise. Fold one of the longer edges up a third of the way, and repeat with the opposite long edge. This will give you 3 equal sections.
Don’t worry about perfect folds. Since one flap will be at the bottom of the puppet, any slight misalignment won’t be noticeable.
Step 2:
Secure the folds by gluing the top flap down. Open up the top fold and apply glue along the entire inside of the flap. Press it down onto the other folded third to prevent the folds from coming undone. Your paper should now resemble a long, narrow rectangle.
Apply glue in small dots or thin lines to avoid making the paper soggy by using too much or applying a thick layer.
You can use white school glue or a glue stick for your paper hand puppet.
Step 3:
Rotate the rectangle vertically. The short sides should now be at the top and bottom. Keep the paper oriented in this position for the remaining steps.
Step 4:
Fold the rectangle in half by bringing the two short edges together. Align one short edge with the other and crease the paper at the fold to secure it.
To hide any visible seams on your puppet, fold the paper so that the glued edge is on the inside of the folded paper, not the outside.
Step 5: Fold the Flaps and Align the Edges
Fold each flap down so that the edges meet the center fold. Then, bring one of the flaps back down and align the edge with the bottom fold. Repeat with the other side. Remember to line up the edges as perfectly as possible for a straight puppet.
Tip: Check your folds from the side to see if they resemble an “M” or a “W.”
Step 6: Glue the Outside Folds
Apply glue to the inside of the two folded flaps. Press them down firmly to secure them in place. Your folded paper should now resemble a “V.” Allow the glue to dry for about 20 seconds before letting go.
Step 7: Leave the Center Fold Unglued
Ensure that the center fold of the paper remains unglued. This will serve as the mouth of your puppet.
Step 8: Decorate Your Puppet
Get creative and decorate your puppet using crayons, markers, or paint. You can also add 3D decorations like ribbon, paper, or googly eyes. If using heavier decorations, opt for hot glue instead of school glue for better durability.
Step 9: Position Your Fingers and Start Puppeteering
Place your thumb in one of the openings along the center crease and insert the rest of your fingers into the adjacent opening. To operate the puppet’s mouth, simply open and close your hand while your fingers are inside the paper. It’s recommended to use your dominant hand for easier control.
Create your unique hand puppet with these simple steps and let your imagination run wild with endless possibilities!
Method 2: Making a Paper Bag Puppet
Supplies:
- Paper Bag
- Acrylic paint (optional)
- Glue
- For decorating (optional): crayons, markers, ribbon, googly eyes, yarn, fabric, color papers, buttons, construction paper, etc.
Instructions:
Step 1: Choosing the Perfect Paper Bag
Find a paper lunch bag that fits comfortably on your hand, ensuring it’s not too loose. The color doesn’t matter as you can easily customize it later.
Step 2: Bringing Your Puppet to Life
No need for complex folding or cutting! Simply slide your hand into the bag, using your fingers to animate the bottom of the bag, giving it a talking mouth effect.
Step 3: Adding a Personal Touch
If you desire a different color, paint the entire bag with acrylic paint. Give it a fresh look with 1-2 layers of paint using a brush or try spray paint for more convenience. Ensure the layers are thin to avoid making the bag soggy.
Step 4: Final Touches
Allow the paint to dry for at least 30 minutes before adding decorations. This ensures the glue adheres properly and won’t slide off.
Step 5: Design Your Puppets
Doll puppets
Transform your paper puppet into an adorable doll with a few simple additions. By attaching googly eyes on top of the puppet and using strands of yarn for hair, you can bring your puppet to life. For extra flair, you can draw a nose and lips, glue on paper ears, or even design a stylish outfit for your puppet.
If you don’t have yarn, no worries! Ribbons or fabric can be used as an alternative for hair. To create a braided look, cut fabric strips and weave them together, just like you would with real hair.
When it comes to clothing, let your imagination soar. Glue fabric scraps, buttons, or even a paper bow tie to give your puppet a unique style. Additionally, you can fashion jewelry, such as a necklace, using string and beads.
Animal puppets
If you’re an animal lover, why not create a dog or cat puppet? Using construction paper, cut out pointy ears for cats or floppy ears for dogs. Glue them onto the puppet along with eyes and a nose. To complete the look, attach a tail made from either paper or pipe cleaners to the back.
To simulate your pet’s stomach, add a large white circle to the front of the bag. For a finishing touch, create a collar by using a piece of ribbon with a bead or by drawing it on with markers.
Tip: Feel free to make any kind of animal puppet you desire, whether it’s an alligator, owl, or bunny. Start with the essential features like ears, eyes, and a tail, and then let your creativity lead the way.
Monster puppet
For those seeking a spooky or silly puppet, a monster puppet is the perfect choice. Get creative by decorating the front of the bag with vibrant colors or patterns such as stripes and polka dots, using either paint or markers. Add oversized eyes and pointy fangs, cut out of construction paper, for a fearsome look. To further enhance your monster puppet, consider adding ears, horns, or a long tongue.
Don’t hold back on your imagination and let your designs and decorations run wild. Utilize items like glitter, feathers, or even pieces of wrapping paper to make your puppet uniquely enchanting.
Step 6: Putting on a Show
With your puppet now complete, it’s time to put on a show! Create different voices for your different puppets, act out stories or jokes, or even sing songs with them. The possibilities are endless when it comes to entertaining with paper bag puppets. So gather some friends and family and get ready for a fun-filled performance. And remember, never forget to have fun while creating and playing with your unique paper bag puppet! The sky’s the limit when it comes to creativity and imagination.
Method 3: Interesting Paper Puppets
Supply:
- Paper
- Black Marker
- Scissors
- Glue
- For decorating (optional): crayons, markers, ribbon, googly eyes, yarn, fabric, color papers, buttons, construction paper, etc.
Instructions:
Step 1: Prepare the Paper
- Start with a standard-sized sheet of paper.
- Fold the paper in half lengthwise to create a clear center line. Then, unfold it.
Step 2: Fold the Corners
Take all four corners of the paper and fold them towards the center line you just created.
Step 3: Fold in Half
Fold the paper widthwise so that the pointed ends meet, creating a neat fold in half.
Step 4: Fold the Corners Again
Identify the two remaining corners and fold them towards the center line.
Step 5: Create a Square Shape
By now, you should have transformed the paper into a square. For visual guidance, please refer to the accompanying pictures.
Step 6: Add Ears
Use scissors to carefully cut the top triangle of the square, creating ear-like shapes.
Step 7: Decorate
Let your creativity shine! Draw a face and add any additional decorations you desire.
Step 8: Finishing Touches
To make the mouth of your creation open and close, place your thumb and index finger inside the two flaps at the bottom. Pinch them together to close the mouth and release them to open it. Now, you’re ready to have some fun!
Method 4: Finger Paper Puppets
Supplies:
- Construction paper
- Glue or tape
- Scissors
- For decorating (optional): crayons, markers, ribbon, googly eyes, yarn, fabric, color papers, buttons, construction paper, etc.
Instruction:
- Cut your desired shape out of construction paper, such as a miniature human figure.
- Cut a short and narrow strip of paper, then roll it into a tube that can snugly fit around your finger.
- Secure the tube by taping it shut, and attach it to the back of your puppet using tape or glue.
Method 5: Puppet Using a Stick
Supplies:
- Paper
- Stick
- Glue or tape
- Scissors
- For decorating (optional): crayons, markers, ribbon, googly eyes, yarn, fabric, color papers, buttons, construction paper, etc.
Instructions:
- Cut a basic shape, such as an oval, out of paper for the face.
- Attach the paper shape to the stick using tape or glue.
- Enhance your puppet by drawing on it, sticking stickers or googly eyes, or attaching decorations like yarn hair or sequins.
- Manipulate the puppet using the stick to bring it to life.
Tips on Creating the Perfect Puppet Characters for Your Puppet Show
- Think about the story or theme of your puppet show before creating your puppets. This will help you choose the right materials and designs for your characters.
- Use different textures and materials to add dimension to your puppets, such as fabric scraps for clothing, feathers for wings, or pipe cleaners for hair. This will make your puppets more visually interesting and engaging.
- Experiment with different styles of puppets, such as hand or finger puppets, to add variety to your show.
- Use bright and bold colors that will catch the audience’s attention and bring your characters to life. Don’t be afraid to mix and match colors to create unique and eye-catching puppets.
- Practice your puppet voices and movements before the show to make sure each character has a distinct personality. This will enhance the audience’s experience and make your show more memorable.
- Have a variety of characters to keep the audience engaged, such as animals, monsters, and humans.
- Give each puppet a unique personality by using different voices or mannerisms when performing with them. This will make the show more entertaining and memorable.
- Have fun and let your creativity shine when designing and performing with your puppet characters. The more enjoyable and imaginative the show is, the more it will captivate your audience. So don’t be afraid to think outside of the box and try new things!
Remember, the most important thing is to have fun and let your imagination run wild. With these tips and methods, you can create an endless variety of paper bag puppets to entertain and delight. So gather your supplies and get ready for an unforgettable show with your unique paper bag puppets! The only limit is your creativity.
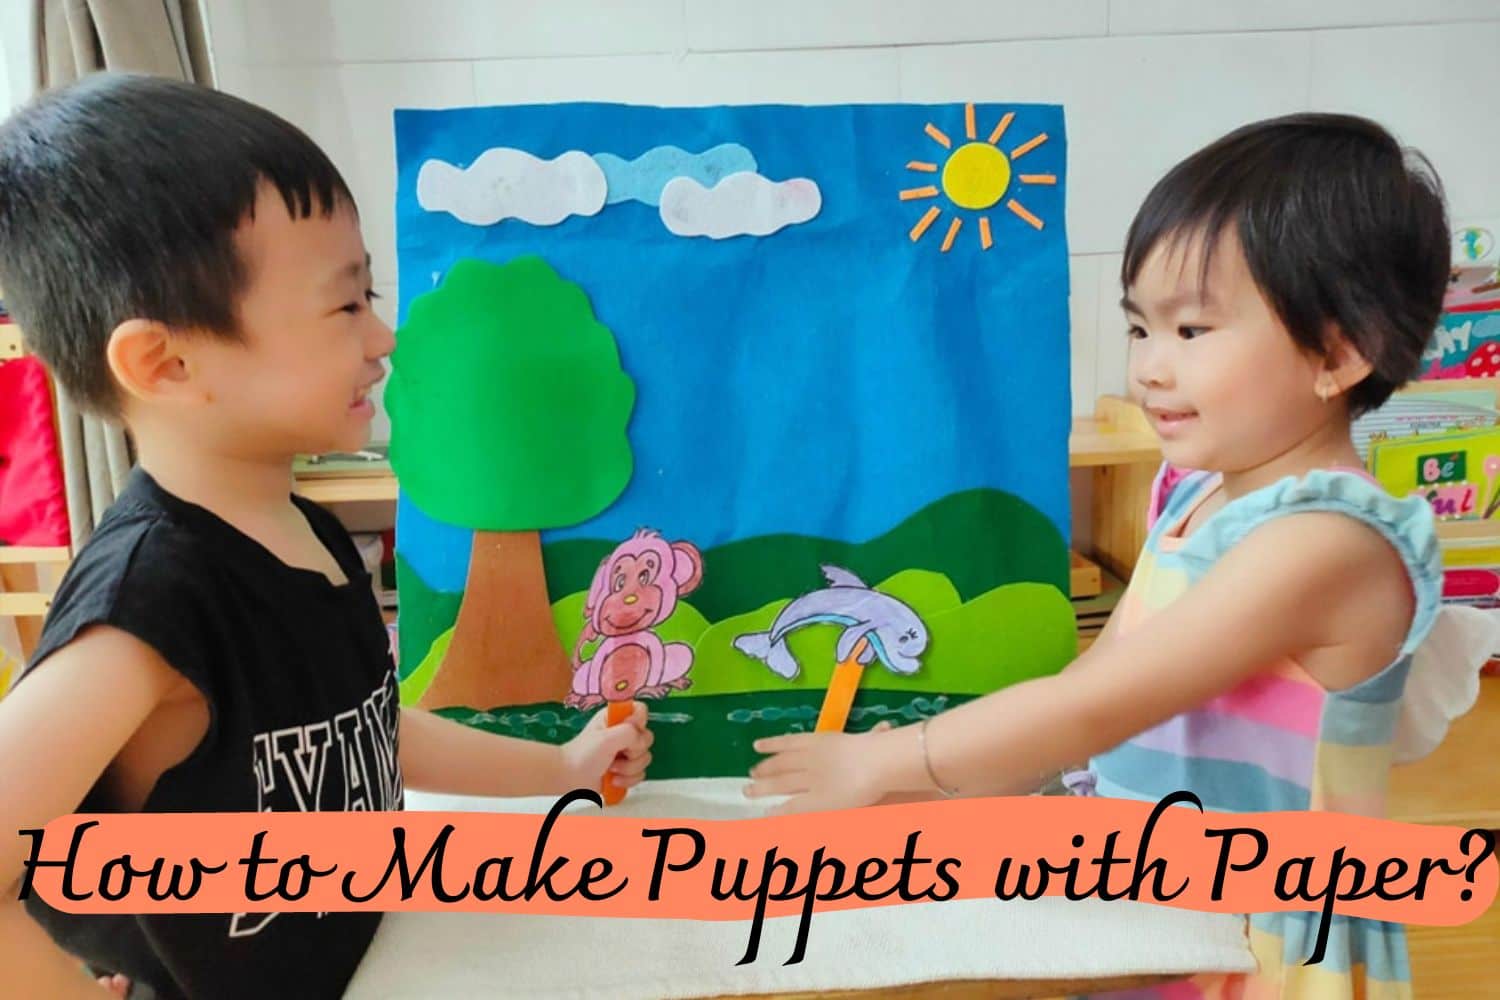
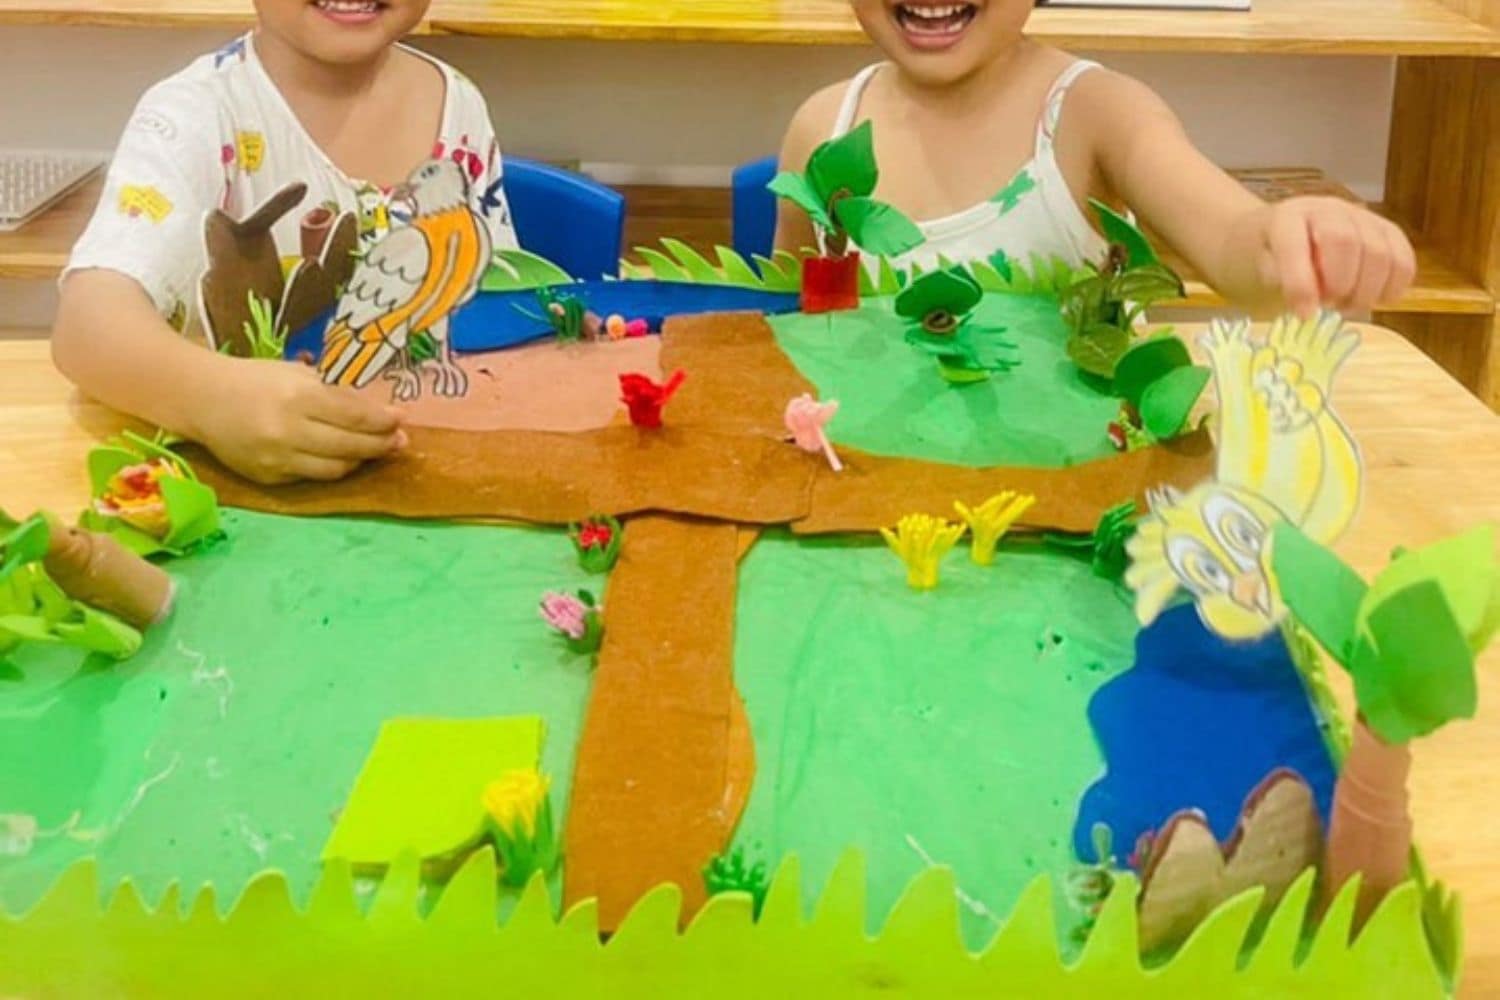
Making a Backdrop for Your Puppet Show – How to Create a Stage for Your Puppets
A puppet show is not complete without a stage for your puppets to perform on. Here’s how you can make a simple and effective backdrop for your paper bag puppet show:
Supplies:
- A large piece of cardboard or poster board
- Paint or markers
- Scissors
- Glue or tape
Instructions:
- Lay the cardboard or poster board flat on a table and decide which side will be the front of your stage.
- Using paint or markers, create a scene on your cardboard/poster board that fits with the theme of your puppet show. This could be a forest, a castle, a cityscape, or any other creative background.
- Once your scene is complete and dry (if using paint), cut a rectangular opening in the center of the cardboard/poster board to create a stage.
- Cut out two smaller rectangles on either side of the main opening to create “wings” for your puppets to enter and exit from.
- If using markers, you can add additional details to the “wings” to enhance the overall look of your stage.
- Use glue or tape to secure your backdrop onto a table or stand behind which you will be performing.
- Now your puppet show is ready for its grand performance on a beautiful and personalized stage! Remember to have fun and let your creativity shine as you bring your paper bag puppets to life on this homemade stage. And don’t forget to take a bow at the end of the show!
Keep experimenting with different designs, materials, and techniques to create an even more amazing puppet show experience each time. The possibilities are endless when it comes to creating entertaining and captivating shows with paper bag puppets!
Putting on the Show – Tips and Tricks for an Engaging Performance With Your Paper Puppets

- Rehearse your show beforehand to ensure smooth transitions between scenes and puppet movements.
- Use music or sound effects to enhance the atmosphere and add an extra layer of entertainment to your show.
- Practice manipulating your puppets with smooth and fluid movements, as this will make them appear more lifelike.
- Incorporate audience participation by having them join in on songs or chants, or even invite some lucky individuals to come up and assist with puppet movements.
- Have a designated person to operate the lighting and sound cues for a more professional-looking show.
- Engage the audience with funny jokes or puns relevant to your puppet show’s theme.
- Provide programs or small handouts with information about your puppet show and its characters, as well as any upcoming shows you may have.
- Lastly, don’t forget to thank your audience and crew for their support and participation after the show! With these tips, your puppet show is sure to be a hit with audiences of all ages. Get ready to put on an unforgettable performance with your talented paper bag puppets! Happy crafting and performing!
FAQs
How do you make a puppet talk?
Creating a talking puppet is a simple process. If your puppet features a movable mouth, simply use your hand to manipulate its mouth to match the dialogue you want to convey. As you move the puppet’s mouth, use your voice to give it life and speak the words.
The audience will be captivated by the puppet’s movements, creating the illusion that it is the one speaking. If your puppet lacks a movable mouth, you can still make it appear as though it is talking by adding movement to its body and syncing it with your voice.
How do you make a puppet walk?
To make your puppet appear to walk, first determine which direction it will be moving in. Then, adjust its arms and legs accordingly as it “steps” forward or backward. Use your hands to control these movements and create a smooth walking motion.
You can also add sound effects, such as footsteps, to enhance the illusion of movement. Practice makes perfect when it comes to making your puppets walk realistically!
Can I use other materials besides paper bags for my puppets?
Absolutely! While paper bags are a great and easily accessible material for making puppets, you can get creative and use other materials such as socks, felt, or even old t-shirts to make unique and interesting puppets.
Just remember to use appropriate materials that are safe for handling and performing with.
How many puppets should I have in my show?
The number of puppets in your show can vary depending on the length and complexity of your performance. Generally, it’s good to have at least three or four main characters to carry the story and engage the audience.
You can also have additional supporting characters for added depth and entertainment. Ultimately, it is up to you as the creator and performer to decide how many puppets are needed for your show.
Just remember not to overwhelm yourself with too many characters! Start small and gradually add more puppets as you become more comfortable with performing. And most importantly, have fun with it!
Conclusion
Now you have the knowledge to make the most incredible paper puppets! Seeing your creation come to life can be such an exciting and rewarding experience. After you build the puppet, let your creativity run free when it comes to decorating and designing costumes for them.
Who knows, maybe one day you’ll make enough of these crafts that you can put on a play with friends or family. With paper puppets, all of your storybook fantasies can become realities. So, what are you waiting for? Get out there and start crafting!
Thanks for reading our article How to Make Puppets with Paper? If you want to know more information, visit our website here.
Read more:
Spring Crafts For Kids That Are Fun and Creative
How to Make a Simple Paper Puppet – wikiHow