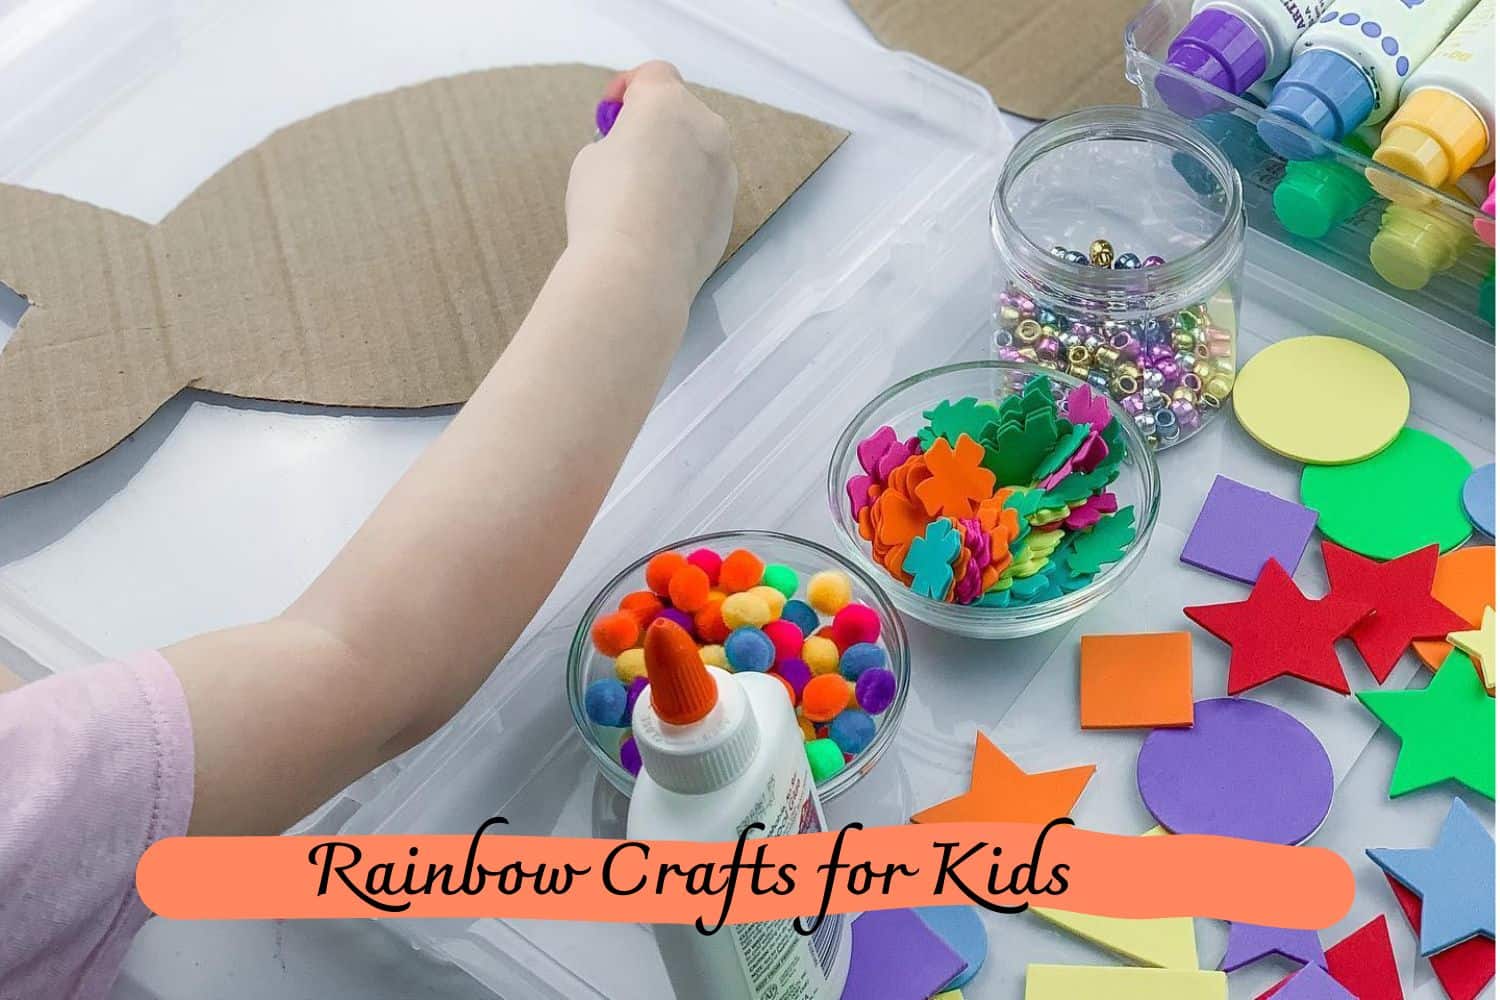
Unleash your child’s inner creativity with these fun and easy rainbow crafts for kids! Keep them entertained this season while sparking their imagination.
Get Creative with Rainbow Crafts for Kids
Do you want to keep your kids entertained and creative while at home? Rainbow crafts are a fantastic way to engage them in fun activities that can help with fine motor development as well as stimulate imaginative play.
From painting rainbows to making jewelry, these rainbow crafts for kids offer an incredibly unique activity for your little ones’ day. So grab the paintbrushes, yarn, paper, and glue, and get ready for some colorful crafting!
13 Rainbow Crafts for Kids Ideas
#1 Paper Strip Rainbows
Materials:
- Rainbow-colored Construction Paper
- Scissors
- Stapler
- Cotton Balls
To create stunning rainbows, gather one sheet of construction paper in each color of the rainbow. Using a variety of six different colors will result in the most visually appealing shapes.
12×9-inch
- Create a 1-inch strip by cutting from the shorter end of a 12×9-inch construction paper.
- Obtain strips of red, orange, yellow, green, blue, and purple, each measuring 1 inch by 9 inches.
- Trim each strip so that it is 1 inch shorter than the previous one in this order: Red (9 inches), Orange (8 inches), Yellow (7 inches), Green (6 inches), Blue (5 inches), Purple (4 inches).
- Arrange the strips on top of each other, aligning the ends, and secure them with a staple about 1/4 inch from the rear.
- Align the ends of the strips on the other side, starting with the shortest (purple and blue), then continue aligning the remaining colors.
- Once again, staple the strips together about 1/4 inch from the end.
- The resulting strips will form a rainbow-shaped arch.
- To create clouds, fluff up a cotton ball. If it doesn’t separate easily, make a small cut with scissors on one side of the cotton ball.
- Stretch and separate the cotton ball into a cloud shape.
- Position one end of the rainbow in the center of the cotton ball. Fold the cotton ball on each side and secure it to the rainbow with a staple.
- Repeat this process for the other side of the rainbow, and your rainbow craft is complete!
#2 Pipe Cleaner Rainbow Magnet
Supplies:
- Pipe cleaners in all the colors of the rainbow
- Some cotton balls
- Some blue felt
- Two magnet pieces
- A hot glue gun.
Instructions:
- Create a vibrant rainbow by organizing and trimming pipe cleaners in rainbow order.
- Shape each pipe cleaner into an arch, nesting the next color inside the previous one.
- Craft a cloud shape from a blue felt or a sturdy material as a base for the hot glue.
- Apply a generous amount of hot glue to the felt cloud and firmly press the pipe cleaners onto it.
- Repeat the process for the other side of the rainbow.
- Now you have a sturdy, arcing rainbow secured by the blue felt clouds.
- Stretch a cotton ball to cover the blue felt piece.
- Apply ample hot glue to the top of the pipe cleaners, ensuring they are well secured.
- Attach the cotton balls to the ends of the rainbow as clouds. The front of the project is now complete.
- If you don’t have magnets, the rainbow is still enjoyable by itself.
- For added fun, attach magnets to the back of the blue felt clouds using hot glue.
- And there you have it – a dazzling rainbow magnet ready to brighten up any kitchen.
#3 Grow a Rainbow Experiment for Kids
Materials:
- Paper Towel
- Washable Markers
- Water
- 2 Small Glasses
Instructions:
- Take a piece of absorbent paper towel and fold it in half. Cut it to a length of 7.5 inches, ensuring that it’s not too long for the rainbow to fully connect.
- Pro tip: For better connection, use a shorter piece of paper towel. We recommend using Bounty paper towels.
- Use markers to draw rectangles of rainbow colors on each end of the paper towel. Fill in the colors generously to ensure enough dye for the paper towel to absorb.
- Pro tip: Apply plenty of marker to the ends to allow a sufficient amount of dye to travel up the paper towel.
- Fill two cups with water, filling them about three-fourths of the way. Make sure that only the bottom of the paper towel will be immersed in the water, leaving some space from the top of the cup.
- Place one end of the paper towel in each cup, ensuring they are not submerged too deeply in the water to prevent the dye from dissolving into the water instead of moving up the paper towel.
- The washable marker dye will gradually travel up with the water, meeting in the center of the paper towel.
- Allow the paper towel to sit for 10-15 minutes, and you will see the colors gradually connect.
- We love how simple and fun this science experiment is! You can extend the learning by experimenting with permanent markers or just water to see how different scenarios affect the results.
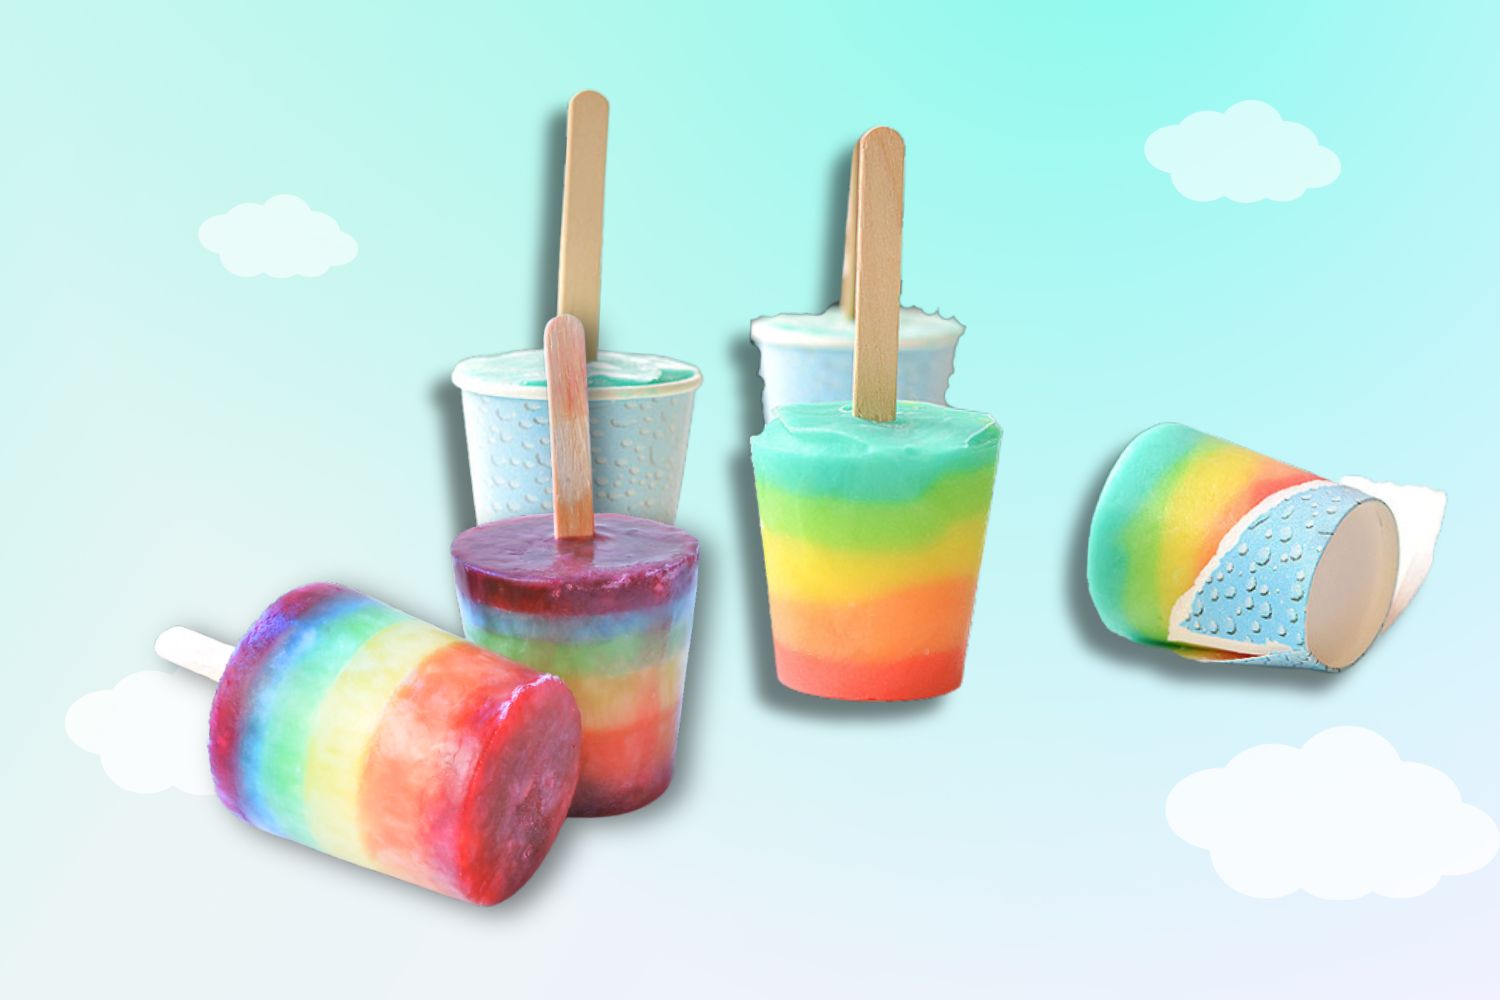
#4 Rainbow Popsicles
Supplies:
Ingredients:
- Instant Jello Pudding
- Milk
- Food Colouring
Materials:
- Dixie Cups (3-ounce size)
- Popsicle Sticks
For the base of these delicious popsicles, I opted for vanilla instant pudding.
Instructions:
- Adjusting the Pudding:
- Use slightly more milk than what the recipe on the box suggests.
- For example, if your 4-serving instant pudding calls for 2 cups of milk use just under 2-2/3 cups. The consistency should be runnier than regular pudding, but thick enough to prevent the layers from mixing.
- Mixing the Layers:
- Divide the pudding equally into 5 bowls (no need for precise measurements).
- Add food coloring to each bowl:
Red Layer: 6 drops of red food coloring.
Orange Layer: 1 drop of red and 5 drops of yellow food coloring.
Yellow Layer: 6 drops of yellow food coloring.
Green Layer: 6 drops of green food coloring.
Blue Layer: 6 drops of blue food coloring.
Purple Layer: 6 drops of purple food coloring.
- Stir each bowl until the color is evenly distributed.
- Layering the Popsicles:
- Add colorful layers to Dixie cups.
- Use a spoon that is smaller than the cup to avoid touching the sides.
- Tap the cup gently on the counter after each layer to even out the pudding.
- Preparing for Freezing:
- Cover the top of each Dixie cup with a small square of tin foil.
- Create a small hole in the center of the foil for the popsicle stick.
- Insert the popsicle stick into the pudding until it reaches the bottom.
- Freezing:
- Place the loaf pan filled with popsicles into the freezer.
- Freeze for approximately 4 to 6 hours until they are ready.
- Enjoying the Popsicles:
- To remove the cups, make a small tear or cut at the top, then peel away the cup from the popsicle.
- Alternatively, you can run the cups under warm water to release the popsicles.
- Kids especially enjoy peeling off the cups.
These easy rainbow popsicles are delightful, simple to make, and perfect for a refreshing summer treat. Enjoy the vibrant colors and minimal dripping when they melt. Your kids will love them!
#5 Rainbow Soap Foam Bubbles Sensory Play
Supplies:
- 2 tablespoons of dish soap
- 1/4 cup of water
- a mixer
- food coloring or Colorations Liquid Watercolors
Instructions:
- In a bowl, combine 2 tablespoons of dish soap and 1/4 cup of water.
- Optional: Add food coloring or Colorations Liquid Watercolors to the mixture.
- Mix vigorously at the highest speed for 1-2 minutes.
- The foam should form stiff peaks that hold their shape.
- Transfer the foam to your desired container.
- Repeat the process as needed until the desired amount of foam is achieved.
Please note the following:
- If your child has sensitive skin, you can substitute their regular bubble bath for dish soap in the recipe.
- This activity is not recommended for young children who may put soap in their mouths or eyes, as soap ingestion or eye contact may cause discomfort.
#6 Rainbow Slime
Ingredients:
If you want to make all six colors, you’ll need to repeat the recipe for each color.
- 6 oz of Elmers Clear Glue: We recommend buying the gallon size as it’s more cost-effective and allows for multiple batches.
Note: We have only tested this recipe with Elmer’s clear glue and cannot guarantee the same results with other brands. Elmer’s white glue can be used, but the slime may not have the same translucent appearance.
- 1/2 teaspoon of Baking Soda
- 1.5 Tablespoons of Contact Lens Solution: Your chosen brand of contact lens solution must contain boric acid and sodium borate, as these ingredients interact with the glue to form the slime. We prefer this brand.
- Liquid Food Coloring: This set offers a range of vibrant colors to make your slime stand out.
Note: Some recipes call for a small amount of water, but in this case, it’s easier to shape the slime without it being too stretchy. Therefore, we recommend skipping the water. However, if you plan on using the colors separately, you can add water if desired.
Instructions:
- Follow our step-by-step instructions for making slime. Important: omit the water in this recipe to make it easier to combine the slime colors.
- Prepare 6 separate batches of slime using different colors. Place each batch in a separate jar before creating the rainbow slime.
- Arrange the colors side-by-side. You won’t need to use the full batch of each color, so set aside a portion to repeat the process.
Note: When mixing the colors, they may turn brown. Mixing slime colors, similar to play dough, results in a combination of colors. However, it’s still enjoyable to create and mix different colors!
#7 Rainbow Button Wind Chime
Materials:
- 1 large, sturdy plastic lid
- Lots of buttons
- String
- 16 pony beads
- 12 tri-beads
- 12 metal canning lids
- Hot glue gun
- White craft glue
- Scissors
- Hammer and a nail
- Thumbtack
- Outdoor craft paint (optional)
Instructions:
- Start by using a hammer and nail to make a hole in the top of each canning lid.
- For added flair, you can paint both sides of the lids and allow them to dry.
- Next, use a thumbtack to create four evenly spaced holes along the inside rim of the plastic lid. These holes will be used for hanging.
- Take another thumbtack and create twelve evenly spaced holes in the top of the plastic lid.
- Now, measure and cut sixteen pieces of string, approximately 24 inches long. Attach a pony bead to the end of each line.
- Set aside four strings, and thread the remaining twelve strings through the top of the lid so the pony bead holds them in place.
- Secure the beads in place using some hot glue.
- Start threading the first string through four large buttons, adding a tri-bead as well. Apply some white glue to each button and the bead.
- Repeat the previous step eleven more times, adding more buttons each time to create a tiered effect.
- Tie the end of each string to a canning lid.
- Lastly, use the four remaining strings to create a hanger. Thread each one through the holes in the sides of the lid. Finally, gather all four strings together and tie them in a knot.
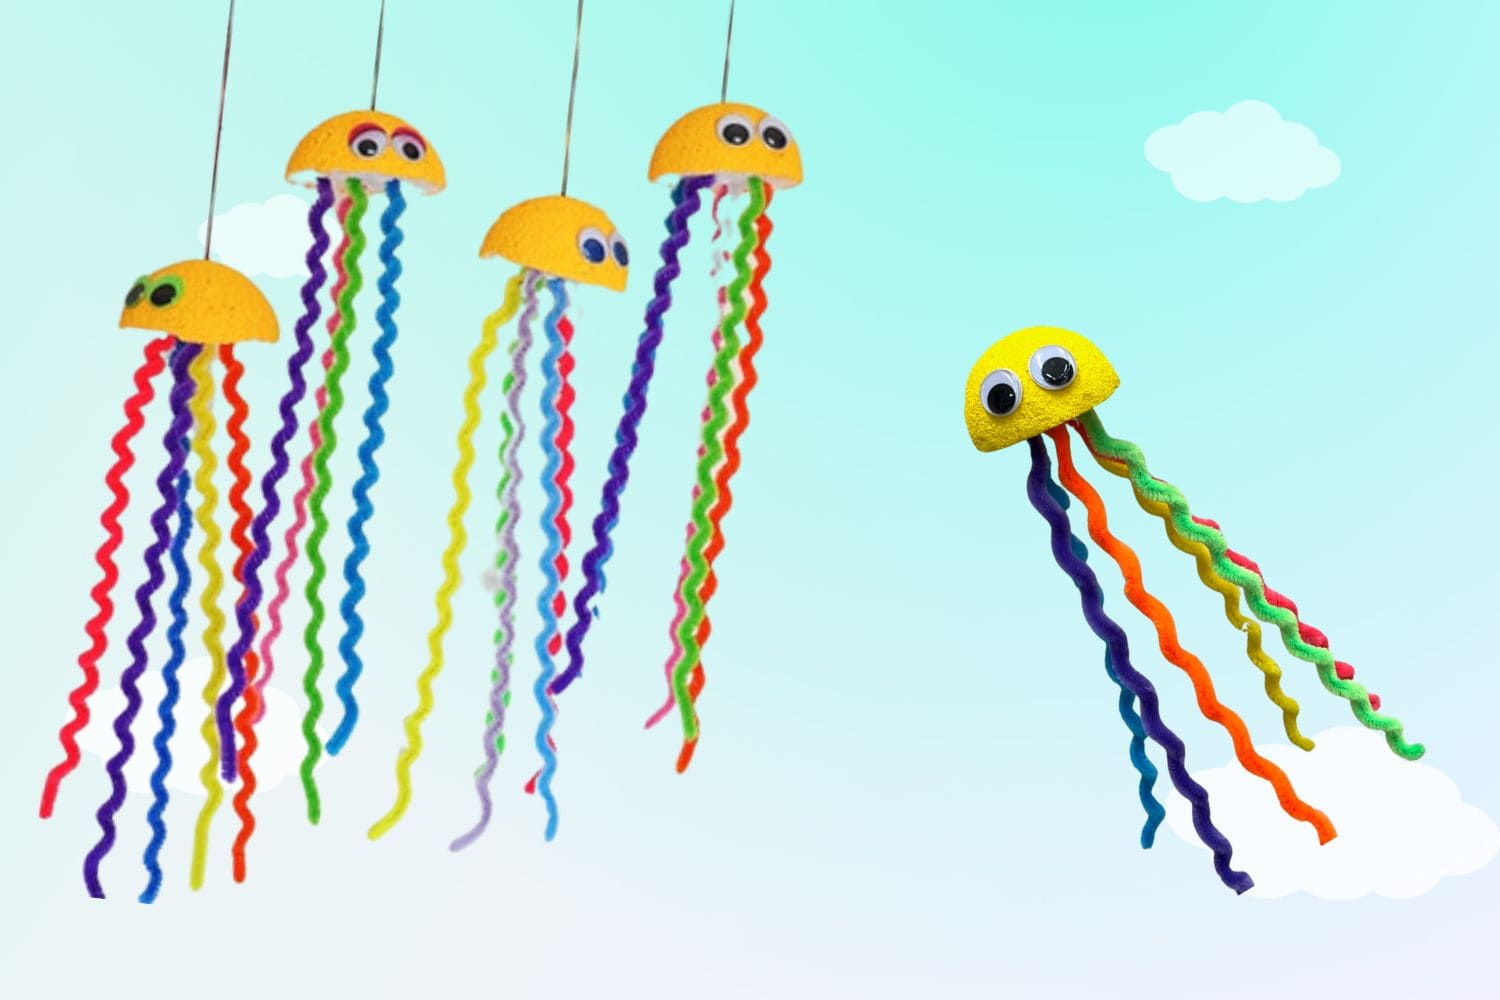
#8 Rainbow Jellyfish Craft
Supplies:
- Styrofoam balls (2 1/2 inch size, 1 ball per jellyfish)
- Yellow paint
- Metal or wood ruler
- Pipe cleaners in vibrant colors
- White craft glue
- String
- Googly eyes
- Toothpick
Instructions:
- Begin by painting the Styrofoam balls a vibrant yellow color. Allow them to fully dry.
- Using a ruler, carefully cut the Styrofoam balls in half.
- Take a pipe cleaner and wrap it around a small paintbrush. Slide the paintbrush out to create a coil. Stretch out the coil as desired. For larger coils, use a larger paintbrush.
- Flip the half ball upside down and insert five pipe cleaners into the flat side.
- Using a toothpick, create a small hole in the center of the rounded top of the ball.
- Fill the hole with a small amount of glue and use the toothpick to push a string into the hole for the hanger.
- Attach googly eyes using glue.
- Allow everything to dry completely before hanging your finished creation.
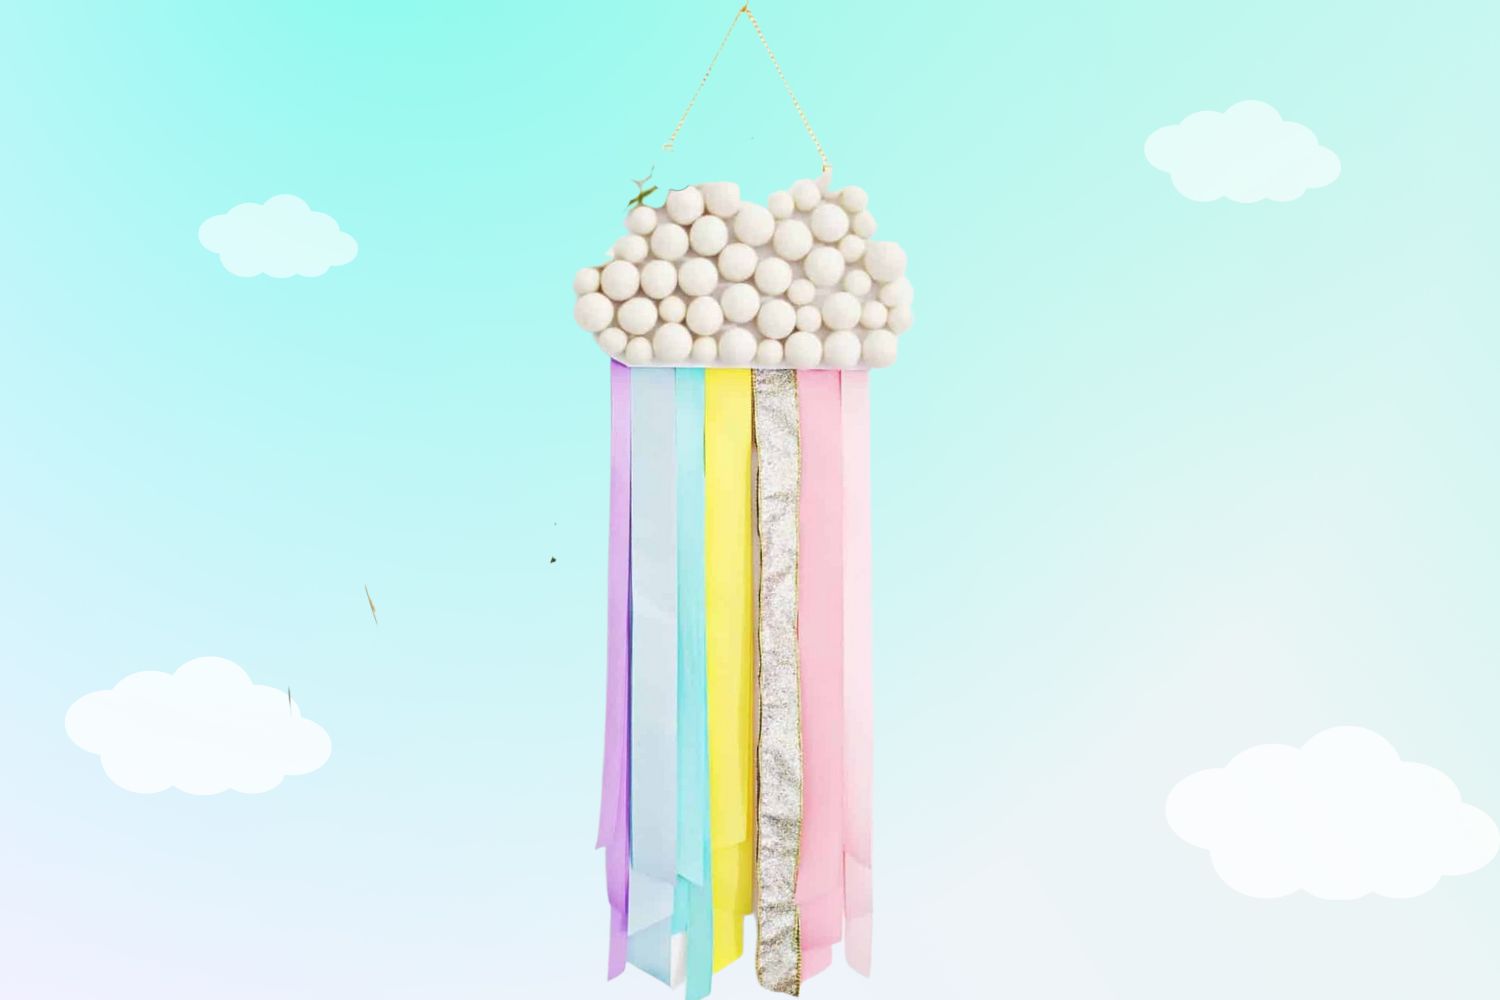
#9 Kid’s Ribbon Rainbow Wall Hanging
Supplies:
- Large and medium white felt balls
- White foam core board
- X-Acto knife and cutting mat
- Hot glue gun
- Rainbow-colored ribbons (preferably grosgrain ribbon)
- Glue-on jewelry bails, jump rings, gold chains, and jewelry kit
Instructions:
- First, arrange the felt balls in a cloud shape on a white foam core board. Take a picture and trace the shape with a pencil. Cut out the cloud shape using an X-Acto knife. Glue each felt ball back onto the board using the picture as a guide.
- Next, attach jewelry bails to the back of the foam core and connect jump rings to each bail using jewelry pliers. Cut a length of chain and attach it to the jump rings.
- Then, decide on the length of the ribbons and cut three of each color slightly longer. Glue the tops of the ribbons together to create a group.
- Glue the ribbon group across the bottom back of the cloud in color order, ensuring to reverse the order from how you want it to appear when hanging.
- Hang the rainbow decoration in your desired spot and trim the ribbons at an angle, with the longest ribbon at the back and the shortest one at the front.
And voila! Your beautiful rainbow decoration is complete. The different lengths of the ribbons add a textured look to the bottom of the rainbow, and the puffy felt balls are just begging to be touched. For an extra touch, you can add a few drops of essential oils onto the felt balls to keep a pleasant scent in a kid’s room (but be cautious with certain oils around young children).
#10 Rainbow Pony Bead Bracelet
Supplies:
- 2 pipe cleaners
- Large green button with 4 holes
- Pony beads (4 of each color: red, orange, yellow, green, blue, purple)
Instructions:
- Start by threading one end of a pipe cleaner through a buttonhole, then threading the other end through the hole on the opposite side, forming a diagonal.
- Repeat the previous step with another pipe cleaner, threading it through the remaining two button holes.
- Separate the ends of the pipe cleaners so that there are two on the left and two on the right of the button.
- String beads onto one pipe cleaner in this order: red, orange, yellow, green, blue, purple. Repeat this step with the second pipe cleaner.
- Keep adding beads to the remaining two pipe cleaners until all four of them have dots on them.
- Twist the ends of the two pipe cleaners together where the beads end. Continue twisting until you reach the end of the pipe cleaners. Repeat this on the other side.
- Close the bracelet around your wrist by twisting the ends of the pipe cleaners together. Leave about an inch of space for adjustment and trim off any excess.
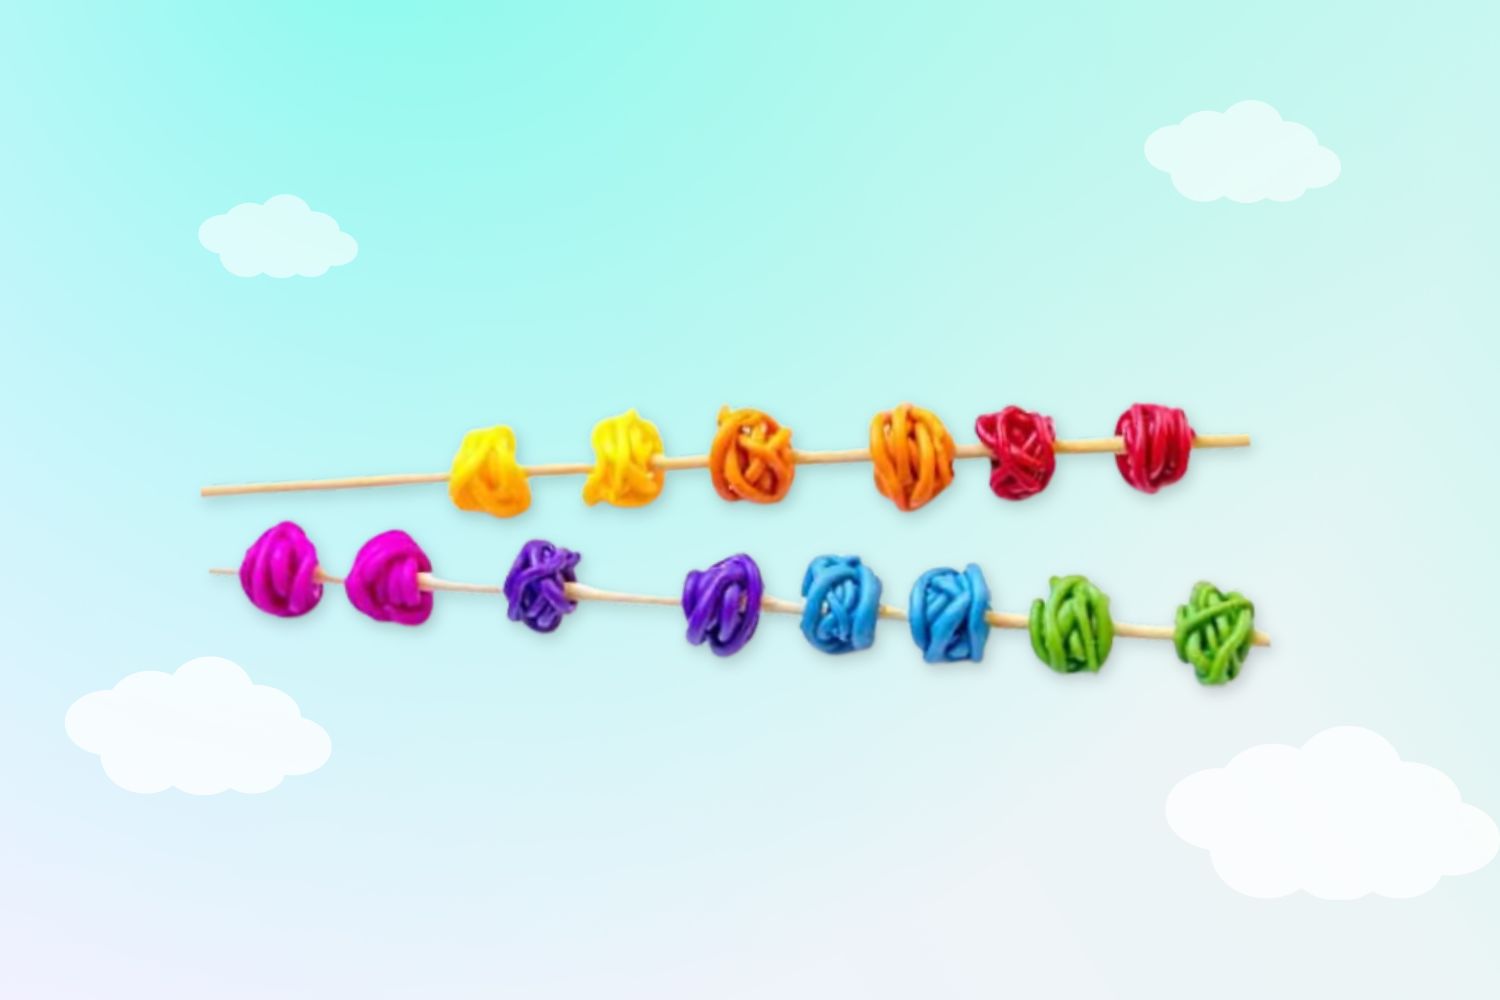
#11 Rainbow Tangle Beads
Supplies:
- Polymer Clay
- Skewers
- Coloured Jewellery Elastic
Instructions:
Create stunning rainbow tangle beads for your homemade jewelry using polymer clay. Begin by warming and kneading a small amount of clay until it becomes soft and pliable. Roll it out into a long, flexible string. You can adjust the thickness of the clay strands to your preference. Our beads were made from threads approximately 1-2mm thick.
To form the tangle bead, wrap the polymer clay loosely and randomly around a skewer until you achieve the desired size. Our beads were approximately 1-2cm in diameter. Remove any excess clay and gently push the loose end down into the bead to secure it.
Continue making rainbow tangle beads along your skewers until you have enough for your jewelry project. This is a fantastic way to utilize any leftover polymer clay colors you may have in your craft cupboard.
To harden the rainbow tangle beads, place the polymer clay skewers onto a baking tray and follow the instructions on your clay packet for baking. Keep in mind that different brands may have different baking requirements.
Once the beads have cooled, thread them onto colored elastic thread to create necklaces or bracelets. The vibrant colors and unique designs of these beads will make your jewelry truly eye-catching.
#12 Paper Plate Tambourine Craft
Supplies:
- Paper Plates
- Paint
- Hole Puncher
- Thin Red Ribbon
- Gold Jingle Bells
- Cotton Balls
- Glue
- Clothes Pins
Instructions:
- Create a vibrant rainbow design on a tambourine.
- After the paint dries, fold a paper plate in half and mark where you want to attach the bells.
- Use a hole punch to make holes at the marked spots on both sides of the plate.
- Cut short sections of ribbon, thread them through the bells, and tie them onto the tambourine. Don’t make them too tight, you want them to jingle!
- To make the tambourine full and soft to hold, stuff the inside with cotton balls.
- Secure the edges of the plate together by gluing them. Use clothes pins to hold it in place while it dries.
#13 DIY Rainbow Playdough
Ingredients:
To create vibrant playdough in any color, simply follow these ingredient measurements. Feel free to multiply the amounts as needed to make multiple colors.
- 1/2 cup flour
- 1/2 cup water
- 1/4 cup salt
- 1 Tablespoon vegetable oil
- 1 teaspoon cream of tartar
- food coloring
- Extra fine biodegradable glitter
Instructions:
Step 1: Combine the dry ingredients
Start by mixing flour, salt, and cream of tartar. This creates the base for your playdough.
Step 2: Add water, oil, and color
Pour in the water and oil, and then add a few drops of food coloring. Mix everything until the colors are evenly distributed.
Step 3: Adjust the color intensity
If you want the colors to be more vibrant, keep adding food coloring and mixing until you’re satisfied with the result.
Step 4: Cook on the stovetop
Place the mixture on medium heat and cook for a couple of minutes. Stir constantly until the mixture reaches a dough-like consistency.
Step 5: Let it cool
Carefully remove the play dough from the heat and set it aside to cool. Be mindful of the hot temperature.
Step 6: Shape and store
Once the playdough has cooled, shape it into a ball and store it in a ziplock bag or airtight container. Keep it refrigerated until you’re ready to play.
Step 7: Repeat for each color
Repeat the steps for each color of playdough you want to create. Have fun experimenting with different shades and combinations!
Step 8: Add some sparkle
For an extra touch of magic, roll the playdough in biodegradable glitter before diving into playtime.
Step 9: Let the fun begin!
Now it’s time for your kids to enjoy the endless possibilities of playing with their very own DIY Rainbow Playdough. Let their imagination run wild and watch the joy unfold!
Conclusion
In conclusion, rainbow crafts for kids are a creative and fun way to teach your children about rainbows while helping them learn essential crafting skills. Whether it’s gluing, cutting, and painting paper rainbows or making a beautiful art project out of multi-colored beads, these kinds of activities can be both educational and entertaining.
From the simple joys of building colorful towers out of blocks to creating a layered painting of rainbow-inspired shapes, there is so much you can do with these customizable crafts.
Plus, it instills little ones with the self-confidence that comes from creating something beautiful — not to mention all the memories of shared time together you will have. So why wait? Get your craft supplies ready today and get your kids crafting!
Thanks for reading our article. If you want to know more information, visit our website here.
Read more: