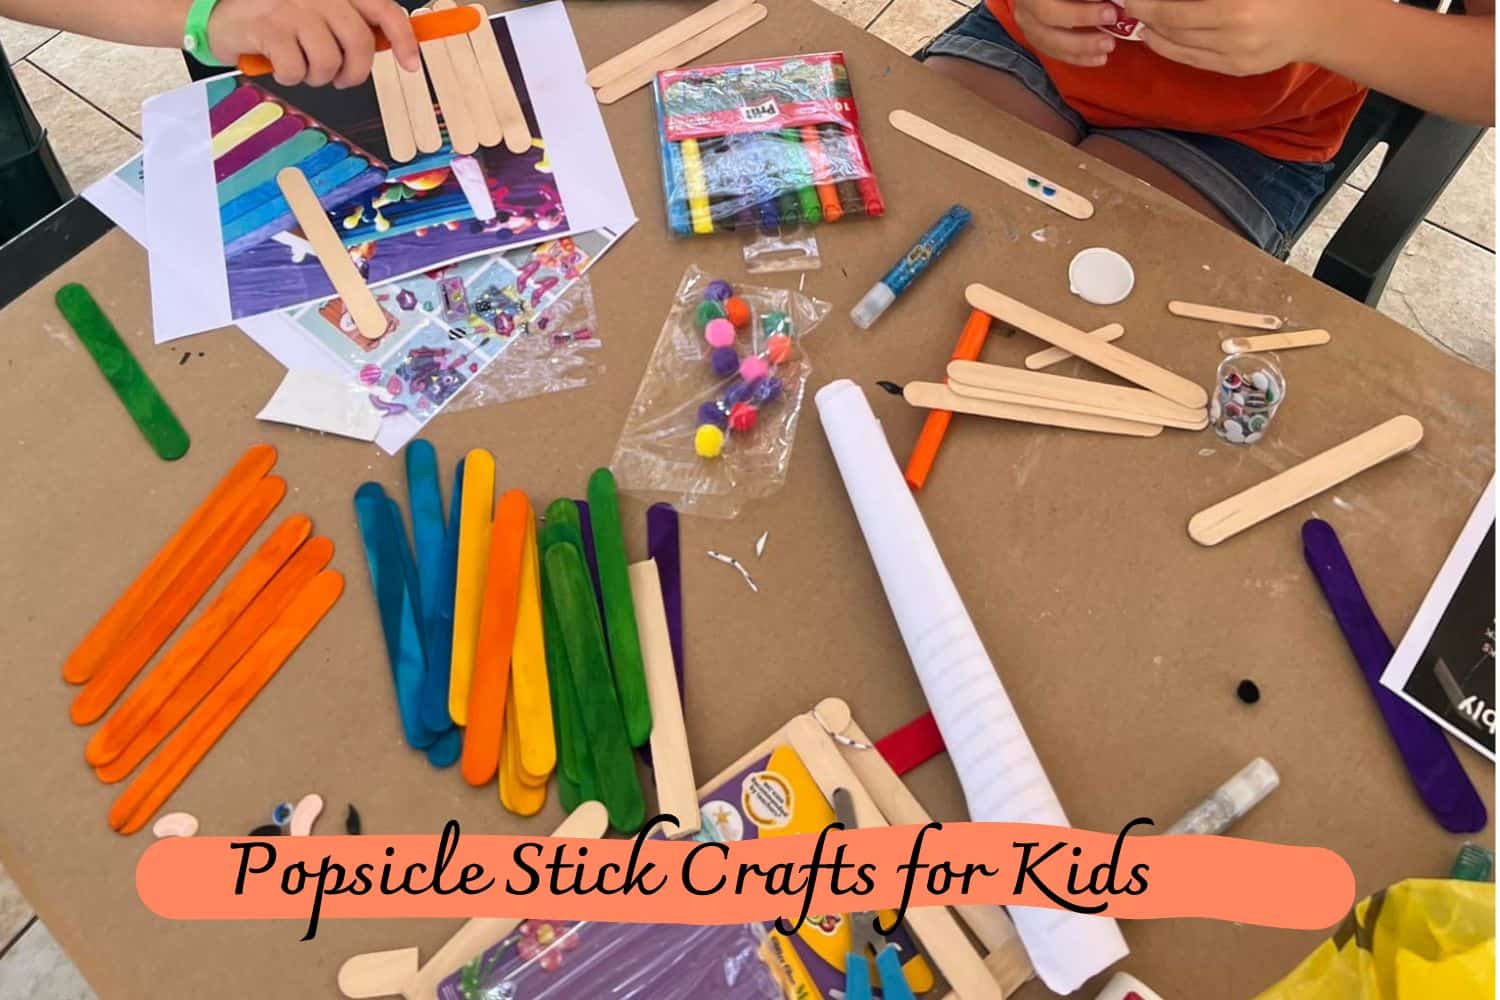
Get creative and have fun with your children while making these easy DIY popsicle stick crafts for kids! These projects are sure to keep everyone entertained.
Popsicle Stick Crafts for Kids | Fun and Creative Ideas
Are you looking for a fun and creative way to keep your children occupied? Why not try some popsicle stick crafts for kids? Not only are popping popsicles a great pastime but they can also be used as the basis of many imaginative projects that will entertain and engage your little ones.
From delightful animals such as owls, frogs, snakes, and lizards to elaborate frames that can be hung in their bedrooms or playrooms – there are plenty of ways to let their imaginations run wild with the help of the humble popsicle stick! Keep reading to discover our top picks for easy-to-do popsicle stick craft ideas for kids.
Popsicle Stick Crafts for Kids Ideas
#1 Build with Popsicle Sticks and Clothespins
Introducing a fun and easy activity for kids – the super simple quiet bin! It’s a creative invitation to work with popsicle sticks and clothespins. Forget about building complex structures or making intricate crafts – this activity is all about letting their imaginations run wild!
Not only does this quiet bin provide a great opportunity for kids to develop their fine motor skills, STEM skills, and problem-solving abilities, but it also helps strengthen their little hands for future writing. Get ready for hours of creative fun!
#2 Popsicle Stick Catapult
Supplies:
- 10 Jumbo Popsicle Sticks
- Rubber Bands
- Ammo options: marshmallows, pompoms, pencil top erasers
- Plastic Spoon (optional)
- Bottle Cap
- Sticky Dots
Instructions:
- Get ready to make some exciting catapults by using a pair of scissors to create two V notches on both ends of two jumbo craft or Popsicle sticks. This step is perfect for preparing ahead of time if you’re building these catapults with a group of kids.
- Take the remaining 8 craft sticks and stack them on top of each other. Secure each end of the stack tightly with a rubber band.
- Now, push one of the notched sticks through the stack, just below the top stick. You can refer to the video for a clearer demonstration. Flip your partially made popsicle stick catapult over so that the stick you pushed in is at the bottom of the stack.
- Lay the second notched stick on top of the stack and use a rubber band to secure the two popsicle sticks together. The V notches you made will help keep the rubber band in place. To create more power, push the stack of sticks towards the notched ends connected by the rubber band.
- Attach a bottle cap to the popsicle stick using sticky dots or strong adhesive. Get ready to let it fly!
Variation: If you want to hold objects like plastic Easter eggs or fake eyeballs, you can also make a popsicle stick catapult using a spoon. It’s especially great for added fun!
#3 Popsicle Stick Launcher
Supplies:
- 4 Craft Sticks (also known as Popsicle Sticks)
- 2 Buttons
- 1 Rubber Band (choose one with a bit of width)
- Crafting Paint
- Plastic Straw
- Glue Gun
- Scissors
- Cotton Swabs
Instructions:
Step 1: Paint two craft sticks one color and two other colors. You can paint them however you like, they don’t have to match.
Step 2: Use a glue gun to attach two popsicle sticks, and repeat with the other two sticks. This will make the structure stronger and provide an anchor point for the rubber band.
Step 3: Decide which stick will be the handle and which will be the crossbar. Glue the crossbar about a quarter of the way from the top of the handle.
Step 4: Place the smooth surface of the handle on top and glue buttons onto the crossbar, about 2 cm from the ends.
Step 5: Cut a straw to a length of 6-8 cm.
Step 6: Glue the straw on top of the handle, just above the crossbar, towards the front. Allow the glue to set for a few minutes.
Step 7: Wrap a rubber band around the end of the crossbar on one side, then repeat on the other side. Pull the longer end of the rubber band and anchor it on the end of the handle. Your Launcher is now ready for action!
How to Use the Craft Stick Launcher
- Start by placing a Q-Tip cotton swab at the end of the straw.
- Carefully lift the rubber band off the end of the handle.
- Pinch the Q-Tip and elastic between your index finger and thumb.
- Pull back until the Q-Tip end is just inside the straw.
- Ensure that your other fingers are out of the way.
- Release and watch it go!
Pro Tip: Engage your kids by challenging them to design launchers with different straw lengths. Longer straws offer a stronger pull on the rubber band, resulting in launches that cover greater distances. However, keep in mind that longer straws require more finger strength. Test it out and discover the optimal design for the best launches!
#4 Newton’s Cradle
Materials:
- Jumbo Craft Sticks
- 6 Marbles
- String
- Scissors
- Glue
- Tape
- Pencil
- Hot Glue Gun and Glue
Instructions:
- Create a square frame by gluing together 4 craft sticks at the corners. Repeat this step with 4 more craft sticks and let them dry. These will serve as the sides of the frame.
- Cut the string into 6 equal pieces, each measuring approximately 8″ long.
- Using hot glue, attach a marble to the center of each piece of string. This will result in 6 separate marbles, each glued to the center of a string.
- Make 6 evenly spaced marks along two craft sticks, each mark should be 1/2″ apart and centered on the sticks.
- Attach one end of each string (with the marbles) to the craft sticks at the marked spots, using tape. Set aside.
- Assemble the frame by using hot glue to attach a craft stick perpendicular to each corner of the two sides. This will form a cube shape.
- Glue the craft stick with the taped strings and marbles to one side of the frame.
- Attach the second marked craft stick to the opposite side of the frame using glue.
- Tape the loose end of each string, with a marble attached, to the marked craft stick. Gently pull on the strings to ensure that the marbles are aligned both horizontally and when viewed from the top.
- Lastly, pull one of the end marbles up and let go! Observe and see what happens!
#5 Popsicle Stick Bracelets
Supplies:
- Popsicle sticks
- Hot glue gun with glue sticks
- Beads
- Jewelry chain
- Acrylic paint
- Paintbrushes
- Jewelry pliers
- Jewelry cutters
Instructions:
- Boil the sticks: Fill a pot with water, add the popsicle sticks, and boil for 30 minutes. This will make the sticks pliable.
- Shape the sticks: After removing them from the water, let the sticks cool for a minute or two. Then, carefully bend them into a half-circle shape and slide them into a glass or jar.
- Bake in the oven: Preheat your oven to 200 degrees. Place the jars with the sticks inside and bake for another 30 minutes. Remove carefully when done.
- Paint the sticks: Once the sticks have cooled, paint them in your desired colors. Allow them to dry completely.
- Add beads: Using a glue gun, attach beads to the sticks to add some extra flair and decoration.
- Finish with jewelry chain: Attach a jewelry chain to the popsicle sticks to complete your homemade jewelry piece.
#6 Mix-n-Match Snakes
Supplies:
- Colored Craft Sticks
- Glue
- Velcro Dots
- Colored Markers
- Red Felt
- Glitter Glue
- Googly Eyes
- Buttons (optional)
Instructions:
- First, arrange 4 or 5 craft sticks in the desired order for the snake body.
- Next, attach Velcro dots to the ends of the sticks, either on the top or bottom depending on the stick arrangement.
- For the snake’s head, cut one stick into thirds. Glue the end pieces side by side, and secure the middle third to the back of them.
- Cut a small rectangle (approximately 2″x ½”) out of red felt. Add a small “V” shape at one end of the rectangle. Glue this piece to the back of the snake’s head.
- Get creative and decorate all the sticks with markers, glitter glue, and buttons.
- Allow the project to dry for about an hour.
- Make different colors and styles of sticks and have fun interchanging them.
#7 Folding Popsicle Fan
Materials:
- Popsicle Sticks
- Paper Fasteners
- Drill
- Paper
- Pen
- Scissors
- Watercolors
- Crayons
- Scotch Tape and Blue Tape
Instructions:
- Grab around 5 Popsicle sticks and attach them using tape. Create a hole at one end that is large enough for the fastener.
- Attach the Popsicle sticks together by inserting a fastener through them. Remove the tape and trim the excess from the fastener.
- Arrange the sticks in a fan-like shape, ensuring they are evenly spaced apart.
- Outline the fan shape around the sticks. Keep the sticks spread apart and then draw the bottom arc of the fan. (Drawing a higher arc enhances the fan’s ability to open and close properly.)
- Cut out the fan shape and decorate it with watercolors or crayons.
- Once the paint is dry, use tape to attach the spread-out Popsicle sticks to the back of the fan. Trim any extra paper.
- Carefully fold the paper fan for the first time. The placement of your folds will be permanent and depend on the shape of the fan’s bottom arc and the spacing between the sticks. (Note: Mine didn’t fold all the way closed.)
- Open and close your fan, enjoying the satisfying motion.
#8 Popsicle Stick Boxes
Supplies:
- Craft sticks (or clean, recycled popsicle sticks)
- White glue
- Craft paint
- Optional embellishments like glitter, sequins, rhinestones, etc.
Instructions:
- Get started by painting your wooden craft sticks or opt for colored craft sticks that you can purchase. After they’re dry, lay out the base of your box using 10-11 sticks to create a square-ish shape. To hold them together, glue two sticks along the perpendicular edges of the base.
- To minimize mess and waste, I recommend using a small bowl of glue and a Q-tip for precise application. Use the Q-tip to make dots of glue at each corner as you layer the sticks to reach your desired height.
- These versatile boxes have countless uses! They’re perfect for a homemade Father’s Day gift, as a stylish organizer for party supplies like straws and cutlery, or as a special place for kids to store their treasures. You can even add a lid if you want.
- Want to take it to the next level? Add a mason jar insert and these popsicle stick boxes can also double as a stunning vase. Simply place a tealight candle in the mason jar to create fun party lights.
- Making these useful little boxes is an enjoyable activity for the whole family, and I guarantee you’ll want to make more once you discover how handy they are. So, let your creativity flow and start creating your craft stick boxes today!
#9 DIY Beaded Wind Chime
Supplies:
- 6 jumbo craft sticks in a beautiful rainbow of colors
- Tacky or Hot glue
- Jewelry wire or fishing line
- Crimp beads (easily found near the beads in any big box or craft store)
- Plastic or crystal beads
- 6 large beads
- Scissors
- Jewelry pliers or regular pliers
Instructions:
- Begin by gluing the craft sticks together to form two triangles. Stack them on top of each other to create a star shape and secure them with glue.
- Cut four pieces of jewelry wire, each measuring 20 inches in length.
- Take one piece of jewelry wire and slide a crimp bead onto the end. Close the crimp bead to secure it in place.
- Start stringing beads onto the wire in your desired pattern. When you reach the halfway point of the strand, add a large bead, followed by another crimp bead to close it off.
- Note: Remember to start and end each strand with a large bead. The large beads at the bottom will create a pleasant sound when they bang together, while the other large beads will support the weight of the star.
- Repeat step 4 to create two more strands in the same way.
- String the fourth strand with beads, leaving only about 4 inches of wire at the end.
- Thread the three strands, one through each hole on the star.
- To finish the decoration, bring the fourth strand up through the middle and gather all four strand ends together. Adjust the strands until the star hangs evenly on the large beads.
- Slip all four strand ends through a bead, add a crimp bead, and close it to secure everything in place.
- Hang up your beautiful creation and enjoy its beauty!
#10 Craft Stick Harmonica
Supplies:
- Craft sticks (thick and thin)
- Elastic bands (the thicker, the better)
- Loom bands (finally a purpose for those extra bands you have)
- Scissors
- Paper
- Toothpicks
- Straws
Instructions:
Step 1:
- Take a craft stick and wrap an elastic band lengthwise around it.
- Cut the straw into two pieces, each the width of the craft stick.
- Place the straws under the elastic band, one at each end.
- Secure everything in place by wrapping loom bands around each end and placing the other craft stick on top.
Step 2:
- Cut a piece of paper to match the length and width of the craft stick.
- Position the paper on one of the craft sticks.
- Place the other craft stick on top and secure one end with a loom band.
- Cut a toothpick to fit the width of the craft stick.
- Insert the toothpick between the craft stick and the paper, sliding it down until it reaches the loom band. Push the toothpick in so that none of it sticks out.
- Repeat step 5 with the other toothpick at the opposite end.
- Finally, wrap a loom band around the other end to complete the project.
#11 Wax paper lantern
Materials:
- Wax Paper
- Crayons in various colors
- Craft Sticks
- Iron
- Scrap Paper or Newspaper
Instructions:
- Cut a piece of wax paper about 10-12 inches long and fold it in half length-wise. Fold each half in half again width-wise, creating 2 sheets that are approximately 5×10-12 in size.
- Color your design on one half of the wax paper sheet. If the color isn’t dark enough, place crayon shavings on the paper instead. Remember, a little goes a long way!
- Fold the wax paper over with the shavings inside. Place on a scrap or newspaper, cover with another piece of paper, and iron on medium heat to melt the crayon shavings and fuse the wax paper. Repeat this step for as many sheets as you’d like.
- Glue craft sticks together to form a square frame. Ensure the frames are completely dry before proceeding.
- Trim the wax paper sheets to fit the craft stick frames, measuring to ensure a perfect fit. Tape the sheets to the inside of the frames.
- Connect the frames by taping two together on the inside, aligning the sides. Repeat this step with the third frame and then carefully fold them all in to form a cube. Add the final frame and tape both edges to securely connect all the frames.
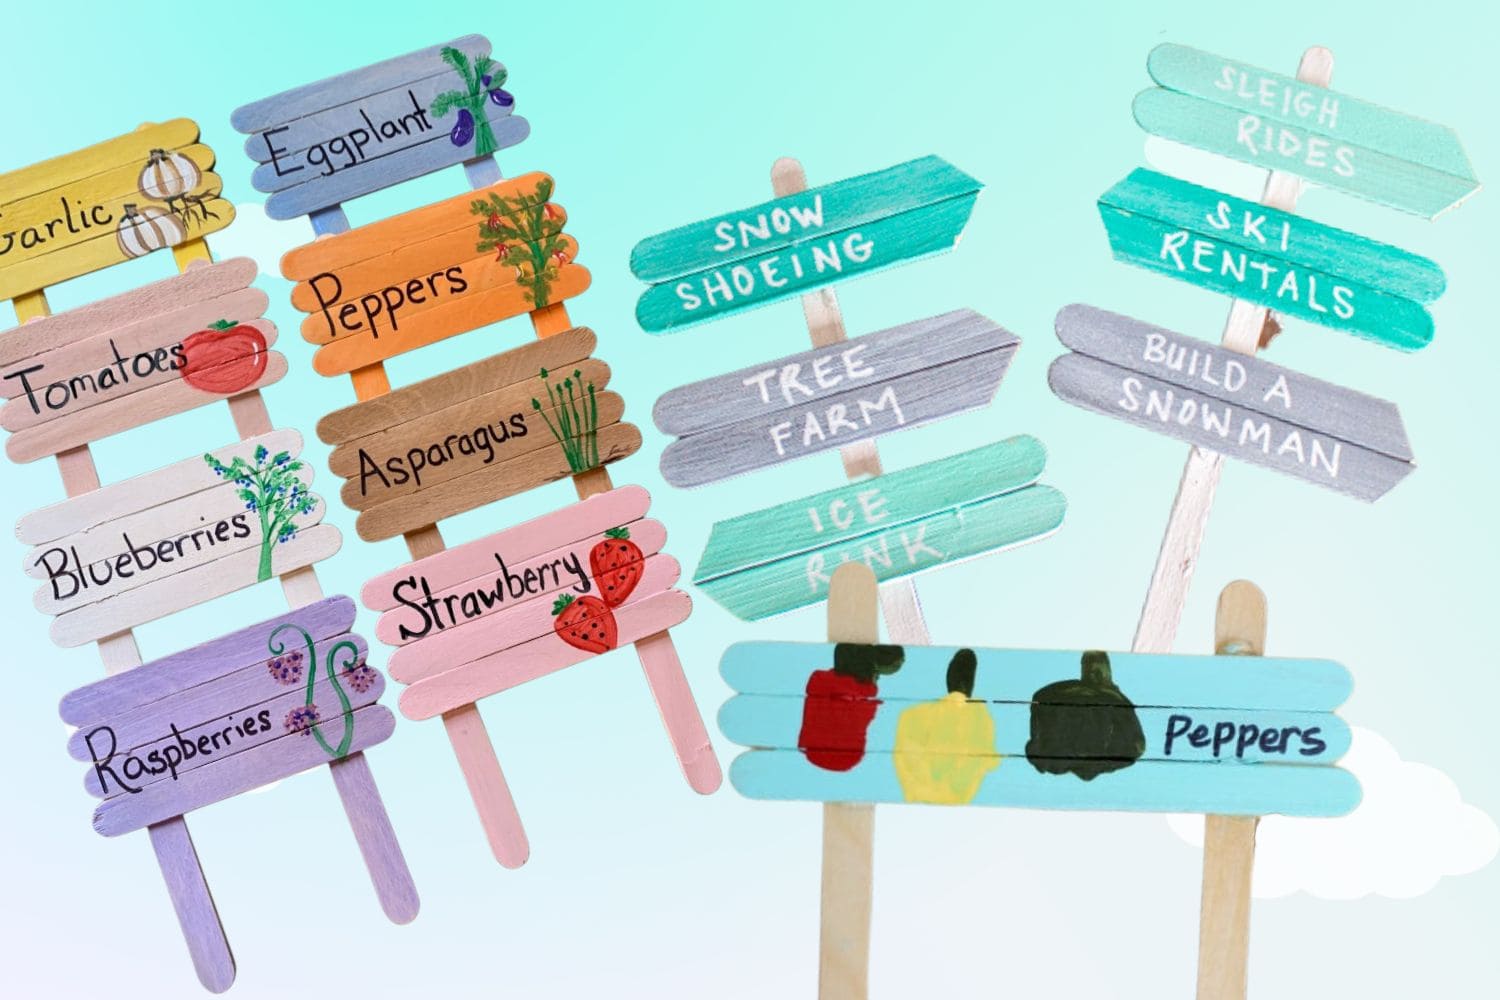
#12 DIY Popsicle Stick Plant Picks
Materials:
- 6 popsicle sticks
- 1 coffee stick
- Bluegrass Green, White, Zinc, and Sea Breeze Acrylics
- Optional: Decor Creme Wax in white
- Optional: snow spray
- Hot glue gun with clear glue sticks
- White paint pen or Sharpie
- Cutting shears.
Instructions:
- Paint the popsicle sticks in three different colors: Bluegrass Green, Zinc, and Sea Breeze.
- Allow the paint to fully dry.
- Paint the wooden coffee stick with white paint.
- Create a weathered look by painting over the popsicle sticks with white creme wax and removing excess paint.
- Once dry, cut the popsicle sticks to 2″ lengths, with one end cut diagonally.
- Sort the sticks by color and align them so that the longer points meet in the middle, forming an arrow shape.
- Use a marker or paint pen to write Winter-themed words on the popsicle sticks.
- Flip the sticks over and use a hot glue gun to attach the painted wooden coffee stick perpendicular to the craft sticks, creating a miniature sign.
- Optional: Lightly spray the sign with snow spray for a snowy effect.
- Insert the sign into planters as planter picks and enjoy the Winter vibe all season long.
#13 Simple Mermaid Popsicle Craft
Supplies:
- Felt
- Popsicle sticks
- Glue
- Pipecleaner
- Googly eyes
- Sparkle cardstock paper
Instructions:
Step 1: Cut out your mermaid’s tail
- Use any shape or material you prefer, like felt
- Trace and cut out the tail shape on a white piece of paper as a guide
- Trace the paper shape onto the felt for easy cutting
- This helps kids follow the lines and avoid wasting felt
Step 2: Attach the tail
Glue each tail onto a popsicle stick using Elmer’s glue or fabric glue
Step 3: Attach a pipe cleaner
- Start at the bottom of the popsicle stick and wrap the pipe cleaner around it
- If you don’t have pipe cleaners, color the popsicle stick with a marker
Step 4: Add hair and eyes
- Use googly eyes or draw the face with a marker
- Get creative with the hair using felt or sparkle paper
Step 5: Final touches
- Add a mouth and cut out a top for the mermaid
- Use leftover felt or glitter cardstock paper for the bikini tops
#14 Popsicle Stick Puzzle
Supplies:
- Masking tape
- Popsicle sticks
- Markers
Instructions:
- Gather ten Popsicle sticks and secure them together with masking tape.
- Get a black Sharpie and draw shapes on the front of the Popsicle sticks.
- Let your child unleash their creativity by filling in the shapes with their favorite colors.
- Remove the masking tape and voila! Your puzzle is assembled and ready to enjoy!
Conclusion
All in all, popsicle stick crafts are a great way for kids to express their creativity. When done properly, popsicle stick projects can lead to hours of fun and learning. These projects are not only educational but also highly creative, making them perfect for rainy afternoons or family arts-and-crafts nights.
Plus, given the abundance of materials necessary for these projects, it’s easy and affordable for anyone to get started! So get your family involved in the crafting process today and enjoy watching your little ones unleash their inner creativity! Who knows what amazing artwork they will come up with next?
Thanks for reading our article Popsicle Stick Crafts for Kids. If you want to know more information, visit our website here.
Read more: